Should I Fix My Car Before Trading It In? You finally decided it was time to trade in your car. The process is straightforward: turn this auto around and get something newer, bigger, and better.
But wait! Before you whip out the chequebook and spill coffee on yourself from signing your name, you’re probably wondering how much of a difference it might make to fix your current wheels. Is it reasonable that fixing your current vehicle could pay off down the line? We’ll look at this question to see if the extra expense is worth it.
If you’re planning to trade your car in, there’s no reason for you to spend money on repairs.
If you’re planning to trade your car in, there’s no reason for you to spend money on repairs. You’re going to trade the car in any way, so it is not necessary to be perfect. The seller of the used car dealership will give you a fair price for your vehicle regardless of its condition so long as they can tell what year and make your vehicle is and that it runs well enough on the test drive. If you want to sell your car yourself (after trading it in), then yes, fixing any problems before selling would probably be a good idea.
Should I Repair My Car Before Trading It In
If you’re considering trading in your car, it’s a good idea to ensure it is as healthy as possible. Aside from checking the engine and transmission condition, other things need to be considered before you exchange your vehicle for cash. Here are just some of the repairs you should consider making before trading in your car.
Repairs You Should Get Done Before Trading In A Car
To get the most for your trade-in, you must ensure your car’s repairs are done before you trade it in. This will give potential buyers the impression that your vehicle is in good condition and ready for a new owner. In addition, this ensures that there aren’t problems with the car’s history report when they go through the process of purchasing it. If you don’t do these repairs yourself and just take them to a mechanic, then they’ll likely cost more than if you did them yourself since mechanics charge per hour (as opposed to flat fees).
Repairing Scratches And Dents
You may be thinking, “Why bother? I can get another car.” But before you trade it in, you want to know what the dealer will offer for your car’s value. The scratch or dent may be the only thing keeping your car from being worth more money, and if that’s true, then it’s worth fixing before you trade it in.
Here are some tips on how to repair scratches and dents:
Use simple tools like sandpaper and a putty knife to remove surface damage from minor scratches and dents. You can also use rubbing compound as a paintless method of repairing any damage caused by small rocks or debris hitting your vehicle while driving down the road (or even general wear-and-tear). This process should take less than 30 minutes per panel if done correctly! The cost of materials shouldn’t exceed $30 per repair job if done by yourself. However, most body shops charge around $50-$100 depending on the severity level of each dent, which means this method could cost upwards of about $100-$200. depending on how many panels need fixing before selling off one old vehicle towards buying another newer model instead.
Repairing Cracked Or Chipped Windshields
Cracked windshields can be repaired, but chips cannot. Although repairing a cracked windshield costs less and is quicker than replacing it, cracks and chips can affect your safety and those around you.
A cracked or chipped windshield may affect your visibility while driving. A crack or chip can cause a distortion in the shape of objects in front of you, making it difficult to see clearly during inclement weather conditions such as rain and snow (or perhaps even hail). In addition, if water accumulates on top of a damaged windshield, it could freeze at high altitudes or when temperatures drop below freezing, potentially affecting your vision while operating the vehicle.
Replacing Batteries
Most batteries are expensive and can be difficult to replace. If a battery is not maintained correctly, it can die relatively quickly. Unfortunately, many people who buy new cars don’t know how to maintain their batteries, so they spend more money on replacements than they need to.
Replacing the battery in your car may seem daunting at first glance, but in most cases, it’s pretty easy and only requires a few tools and basic knowledge about how the engine works. Of course, you’ll also need access to your owner’s manual for instructions on where exactly you should be looking for everything inside the engine compartment of your vehicle. Still, once you get past this initial step, there shouldn’t be any problems with replacing your old battery with a new one!
Replacing Faulty Lights
When you’re selling your car, the safety and appearance of the vehicle are essential. You want to make sure that all of the lights are working properly before taking them to be inspected.
It’s essential to check all of your lights: headlights, taillights, brake lights (including the reverse), turn signals (including hazard) and parking lights (if applicable). If any of these are not functioning correctly or if there are any cracks in the lenses, then they should be replaced before having an inspection done on your car.
Fixing Any Leaks
Another good reason to fix leaks is that they can cause rust and corrosion in the engine, which could result in damage. There are a few common causes of leaks:
Broken or loose hoses
Faulty gaskets
A leak on a metal part of the engine (such as an exhaust) that needs replacement
Do You Have To Replace Your Car Battery Before You Trade It In
It would help if you replaced your battery before you traded it in. The good news is that this is an inexpensive and easy fix. Replacing a car battery only takes about 45 minutes and usually costs less than $100. It’s one of the cheapest fixes to make before trading in your vehicle, which means that even if you don’t plan on keeping the car for long, it’s worth getting taken care of now rather than later.
If your battery is over 3 years old, it needs to be checked out by a professional mechanic before you can sell or donate your car. At the same time, many batteries can last up to 7 years with regular maintenance and care if yours hasn’t been replaced recently enough for proper support from its manufacturer (or if its warranty has expired). Then there are risks involved when using it beyond its expiration date. Those risks may end up costing much more money down the road.
Many Repairs Are Necessary Before You Trade In Your Car
Many repairs are required to get the best value for your car, so it’s important to know what they are and how much they’ll cost.
You can do some of these repairs yourself or hire a mechanic to complete them for you.
Repairs can be done at an auto parts store or by a mechanic at a car dealership.
Should I Detail My Car Before Trade In
Detailing your car ensures that it’s clean, polished and looking its best. This is an important step when you’re about to trade in your car for a newer model, as a few things can make or break the deal.
If you haven’t done this before, don’t worry: detailing doesn’t have to be challenging or time-consuming. You’ll need some supplies and maybe even a little practice to get started. For example:
A microfiber cloth (or two)
Waterless car wash formula or polish product
Should I Clean My Car Before Trading It In
When you trade in your car, the dealer will inspect it. If there are any dents or scratches, you’ll be charged for them. This can affect the amount that they give you for your trade-in. Also, if you don’t clean the inside of your car before trading it in, they may deduct a percentage from what they’re willing to pay for it because of dirt and grime on the surfaces (believe me, I know).
Is It Better To Fix A Car Before Trade In
If you plan to trade in your car, you should not spend money on repairs. This is because the value of your vehicle will depreciate more quickly if it’s in poor condition, and you can’t expect anyone to pay top dollar for it when they examine the car.
If there’s something wrong with your car that isn’t a safety issue (and there were plenty of those), then wait until after the trade in has been completed before making any repairs.
When Trading In A Car What Do You Need?
To be able to trade in your vehicle, you will need several things. These include:
The title of the car. Without this document, you cannot transfer ownership of the vehicle to a new owner. If you have lost it or do not have it at all, contact your state’s department of motor vehicles (DMV) and ask them how to get another copy of it or find out if there is any other way for you to prove that you own your car without having its title in hand;
Registration papers for that vehicle;
A bill of sale detailing what was paid for the car when it was traded in.
When Are You Able To Trade In Your Car?
When do you need to pay the loan off?
When do you need to pay the lease off?
How long does it take to sell your car?
It takes a few weeks for most people, but some factors can affect how long it takes.
In Conclusion
Asking these questions before you take your car to be repaired will help you make the right decision. You can get a good idea of whether or not it’s worth fixing up by checking its value online and seeing how much money there is between what it’s worth now and how much it would cost for repairs. If there isn’t enough money for repairs, then don’t spend any more on them because you won’t get anything back anyway!
Can you feed a baby in a car seat? Yes, you can feed your baby in a car seat. However, For this purpose keep in mind certain things.
You can feed a baby in a car seat if you do so safely.
Feeding a baby in a car seat is possible, but you must be careful. Here are some things to remember:
The baby should be strapped in the car seat. When you put your infant into their car seat, ensure they are securely fastened with a safety harness or seat belt.
The car seat should be positioned safely in the back of the vehicle. You should always put your child’s car seat in the backseat of your vehicle if you get into an accident. There is sudden braking or impact from behind; it minimizes any potential harm to them because they’re not near sharp objects such as mirrors or glass windows on doors that might shatter during an impact event like this! Also, make sure there’s nothing else blocking them from being able to move away from direct contact with these items too!
Never feed a baby in a moving car
Even if the car is parked Never leave an infant alone in a car seat for any reason. Avoid backseat feeding when possible, as it becomes difficult for a mother to feed her baby while driving.
Never leave an infant alone in a car seat for any reason
Don’t leave your baby alone in a car seat. You may think that it’s okay to feed your child in the car seat, but if you do so, there is an increased risk of injury or death for your baby. A child can move around inside the car seat and fall out of it, and if they do fall out, they could be crushed by another passenger or hit objects inside the vehicle.
Even if you’re not feeding your baby while driving, never leave them unattended in their car seat at all times. Of course, you must also ensure they’re safely strapped into their car seats (see below).
Feed your baby in a stationary car that has been turned off
Please turn off your car, and park it as safely as possible.
Be sure to place your car seat safely, away from any hazards such as moving parts or sharp edges that might damage the seat.
Ensure you do not leave the baby alone in the car seat while you are away from the vehicle.
Avoid backseat feeding when possible
One of the most common reasons for backseat feeding is for a baby to be fed when you’re out and about.
This can be done safely if you’re not driving. But, for example, if your partner is at home with your baby and they need a bottle. It’s best to take the time to devise some system where they can easily feed them in their car seat without worrying about spilling any milk on either themselves or the car seat material. This will ensure that everyone stays safe while also ensuring that the baby gets the caloric intake needed during this stage of life.
If you must drive while feeding your child, you must use caution and common sense and avoid doing so whenever possible.
It becomes difficult for a mother to feed her baby while driving
While you may be eager to feed your baby, you should not do it while driving. It is dangerous for both the mother and her child. The baby can be distracted by the food and not pay attention to the road, causing a possible accident. If the mother is distracted by feeding her child and hits something (for example, another car), she and her child could be injured or killed.
The Even flow infant car seat can fulfil a mother’s keen desire to breastfeed
Evenflo is a trusted brand in the baby world. They have been producing high-quality products since 1936, and their infant car seat is no exception. The Evenflo Nurture Infant Car Seat is designed to be comfortable for you and your baby, so you can rest assured that it is safe to use while breastfeeding.
Evenflo’s Nurture Infant Car Seat features a five-point harness that will prevent your child from moving around and causing any harm while you drive them to their next destination. It also has an adjustable headrest that allows you to properly position your child without taking them out of the seatbelt whenever they need a new position. This feature makes it easy for mothers who want to breastfeed in their vehicle because they won’t have trouble finding a comfortable way for themselves and their child during travel time; thanks again!
You can strap your child in the car seat and then breastfeed or bottle feed
Breastfeeding or bottle feeding a baby in a car seat is not as complicated as you think. It is essential to make your child comfortable and safe while strapped in their car seat. If you have your little one strapped safely into their car seat, and if you have fixed the headrest tilt so that it’s at an angle that supports your baby’s neck, then there is no reason they cannot be fed while strapped in their car seat.
It’s also important not to worry about making your child sit upright to drink milk. They can easily be given food from across the front of the car seat without having to sit up straight of their own accord.
You need not worry about making your child sit upright in the car seat to drink milk
You need not worry about making your child sit upright in the car seat to drink milk. If you are in a moving vehicle, it’s best to wait until you have come to a rest. Whether you are driving or not, never leave your baby alone in a car seat for any reason.
It’s important to note that many experts do not recommend backseat feeding when possible. This is because there are safety concerns associated with this practice. In addition, because babies and toddlers cannot hold their heads up by themselves until around 9 months old (though some younger children naturally hold their heads up sooner), they must be appropriately positioned, so they don’t choke on food and drink while being fed from bottles, sippy cups or breastmilk storage bags.
A baby should always be strapped in a car seat for safety reasons
The car seat should be installed correctly, and you should use it as intended.
It would help if you did not use the car seat on aeroplanes or other vehicles except in an emergency.
You shouldn’t use the car seat as a bed, either, because you could injure your baby if you roll over while sleeping and the baby is still strapped into it.
Can you feed a baby in a car seat or milk in a car seat?
You can feed a baby in a car seat if you do so safely.
Never feed your baby in a moving vehicle.
Never leave an infant alone in a car seat for any reason unless the car is turned off and the doors are locked.
If you have an infant, never leave them alone in the bouncer for any reason, including when you’re trying to feed them. Feeding an infant can be challenging enough without worrying about what could happen during that time.
Also, remember that babies shouldn’t be fed while moving (so don’t try driving down the highway while making sure your child doesn’t spill their bottle). And if possible, avoid backseat feeding; this will save time and reduce anxiety further down the line!
How long can a baby be in a car seat
You should never leave your child in their car seat for longer than two hours. If you’re going out for an extended period, it’s best to bring a stroller or carrier.
If the temperature is 70 degrees or higher, you can keep your baby in their car seat for up to one hour (assuming they are properly buckled in). However, if it’s colder than 50 degrees outside, then make sure you remove them from their seat after 30 minutes and definitely before they start shivering!
Conclusion
The Evenflo car seat is an excellent product for feeding babies. It is easy to use, comfortable and safe. You can easily strap your child in the car seat and then breastfeed or bottle feed. The car seat straps restrain the baby from falling out of it.
Is it bad if your car battery gets wet? Or, how can you tell if it has been exposed to water? If you do notice that your car battery has gotten wet, it may be damaged and not work correctly. A quick rinse is okay, but too much water can cause damage. This can also cause damage to the charging system and electrical components in your car.
Yes, you can use a car battery that has gotten wet.
Yes, you can use a car battery that has gotten wet. However, there are some essential things to consider when doing so. First and foremost: how long can a car battery get wet?
How much water can a car battery get wet?
It’s best to check on your battery every few weeks and ensure it doesn’t have any standing water. It might take a few days or even weeks for the inside of the battery compartment to dry out completely after getting rained on or flooded with water from another source; however, most batteries should be safe if they’ve been exposed to rainwater for less than 24 hours without being submerged in it (or without being left outside during a rainstorm). The time that elapses between exposure and when you notice any damage depends on several factors, including temperature and humidity, as well as whether there was any corrosion on the metal parts before getting damaged by moisture.
However, if water is left on the battery or gets soaked in water for a long time, it may be damaged and not work correctly.
Knowing that water can corrode the battery and cause it to fail is essential. Therefore, if you get your battery wet, dry it off as soon as possible. Warming up a wet battery will help remove any excess moisture that the plates may have absorbed inside your battery.
If the battery becomes corroded, this can also cause damage to the charging system and electrical components in your car.
Corrosion is a natural process that occurs when water, salt or other contaminants come into contact with the battery’s terminals and cause a chemical reaction. For example, suppose your car is left in wet conditions for an extended period. In that case, corrosion can occur on the battery’s terminals, which can cause damage to the charging system and electrical components in your car.
For example, if you drive through a puddle of standing water (or even park under some trees) and it rains heavily afterwards, this increases the risk of corrosion to your car battery.
Does rain affect a car battery?
If you’re wondering if the rain will hurt your car battery, the answer is yes. Rainwater can seep into the battery and damage it, so if your car’s been exposed to wet weather, it’s best to check on the condition of your auto battery. If water has gotten into it, you’ll want to clean and dry out that thing ASAP.
What Happens If a Car Battery Gets Wet?
Several things happen as soon as the water gets inside a car battery.
Car batteries do not generally have trouble in the rain.
In general, car batteries do not have trouble in the rain. A sealed battery is protected by the engine compartment and is not exposed to the elements. The battery terminals are also protected by a rubber boot that keeps rainwater from entering the engine compartment if it somehow gets inside.
In some cases, heavy rains can cause water to enter your engine compartment through cracks or holes in your vehicle’s bodywork and wet various electrical components, including your fuse box, starter motor and alternator.
If this happens, then it’s likely that these parts will become damaged over time as they rust away or seize up due to corrosion caused by regular moisture exposure (this is one reason you should change your oil every 3 months).
Heavy rains may also cause flooding, which could result in damage being done to other parts such as brake callipers (the part which presses against pads when braking) as well as wheel hubs/bearings, thanks largely thanks their proximity to ground surface levels due primarily because most road surfaces slope downwards towards edges where drainage channels exist for runoff water during intense downpours!
Contamination or physical damage can cause problems for a battery in the rain.
Rain can be a problem for a car battery, primarily if it’s not maintained correctly. In addition, rainwater can cause corrosion and damage to the battery, so it’s essential to know how to care for your vehicle’s battery during rainy weather.
If you see signs of contamination or physical damage on your car’s battery, you should probably take it in for service immediately. Your local garage should be able to diagnose and repair any issues with your vehicle’s electrical system at no additional cost.
A car battery should be covered from contamination.
If you live in an area that gets a lot of precipitation, keeping your car battery clean and covered is essential. Dirt can build up on the battery and prevent it from being able to do its job correctly. You should also make sure that your car is parked away from trees or other tall objects so that if there is heavy rain or snowfall, the water will not end up in your engine compartment.
It would help if you also tried not to leave your car parked near heat sources like grills or fires because this can cause overheating problems when combined with hot weather conditions. If possible, try parking in an air-conditioned garage if you can access one at work or home.
Can A Car Battery Get Wet?
The answer is yes, batteries can get wet, but it shouldn’t happen. Before using your car battery again, make sure it hasn’t been in any way exposed to dampness or water. Before using a new battery, completely dry the old one if it has any damage. After a wetting occurrence, if your car battery shows no evidence of damage, carry on as normal and resume driving!
You need to ensure it’s dried out before using it again. To do this:
Please remove the battery from your car or boat and place it in a dry area with plenty of ventilation.
Dry with towels or rags until all moisture has been removed from around the terminals and case (you can also leave your battery outside in the sun to help speed up this process). Some water may have gotten into the casing of your battery. If so, use an old toothbrush or similar tool to remove any remaining bits of dirt and debris from the inside before placing them back into service.
Ensure not to touch any metal parts after touching any part of your body, as this could cause an electrical shock! If there is still moisture inside after drying out completely. Then try putting some baking soda over each terminal first and then spraying some vinegar over them -this will react, creating CO2 bubbles, which will help release more trapped liquid within those areas.
Conclusion
Finally, it is advisable to avoid getting your car’s battery wet as much as you can because doing so can result in harm. However, if water does get inside the battery compartment and you don’t have time to clean it up before starting your car, don’t worry about it too much. Just be sure to dry off any excess moisture or corrosion from the battery terminals before reconnecting them back up with the cables!
Here’s What People Are Saying About Best Brake Pads For Harley Davidson Touring
5 Strange Facts About Best Brake Pads For Harley Davidson Touring
Fact 1: You won’t need to buy expensive brake pads.
Fact 2: You can do it yourself in an hour.
Fact 3: You don’t need to use any tools.
Fact 4: You can do it without getting dirty (it’s a dry job).
Fact 5: You will be safe on the road after doing this job. As the quality of your brakes increases and you enjoy much better control over them!
Best Brake Pads For Harley Davidson Touring – What Can You Learn From Your Critics
You may be wondering, how will I know if the brake pads are right for me? Well, there are a couple of ways you can find out. First, we have a large community of dedicated riders who write reviews on our site. And share their experience with products they’ve tried. We also have professional mechanics working in local shops. Who are happy to answer your questions or help you find the best product for your needs. Our goal is not only to provide an honest review as an unbiased third party. But also to help people make informed decisions by providing them with as much information as possible.
Best Brake Pads For Harley Davidson Touring Strategies For Beginners
The first step to choosing the best brake pads for Harley Davidson touring is figuring out what you want to achieve. Most importantly, this means knowing what your needs are and how those needs might change over time. If you’re working with a limited budget, now or in the future, this is an especially important question. If you’re just starting to ride a motorcycle and don’t have much experience under your belt yet?
It’s also important to consider what resources are available to guide you. Some people don’t consider these items until they are knee-deep in their decision-making process. Then they make mistakes that a little extra planning can’t avoid! We’ve got loads of great advice at BikeBandit HQ so you don’t have to worry. Let’s start now!
Some Tips For Choosing Best Brake Pads For Harley Davidson Touring
Here are some tips to help you choose the right brake pads for your Harley Davidson Touring:
Make sure you are buying from a reliable seller. When looking at different options, make sure that you check out the product description and reviews from other customers to make sure that they have positive comments about their experience with the seller of the product you want to buy.
Know what length brake pads you want for your motor motorcycle so you can get the perfect suit whilst putting them on your vehicle’s wheels or rims (if needed). It has an excellent style of brakes used on Harley Davidson touring bikes: drum brakes and disc brakes; Each type of braking tool and wheel configuration has its own form associated with it due to the fact that all bikes may not have a known set of measurements in this elegance as each functional varies completely based on what they were based on.
Made or what year model they were artificial so now it’s not so important not to recognize how much space is available to auto car interior miles but furthermore, how much spherical area each wheel has rather than making any sort of selection about what kind of artwork will be. Know in advance. Nice as well!
Make sure that whatever brand name or type of off-brand products might offer compatibility issues with OEM replacement parts available through aftermarket suppliers like Amazon marketplace sellers.
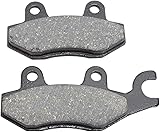
Best brake pads for Harley Davidson touring
Harley Davidson is the best for touring. Don’t be afraid of these brake pads. There are plenty of options that are better than the stock pads, even though they may be a little more expensive.
Maybe a little pricier than other pads on the market.
Recommended Uses: If you want a quiet brake pad that lasts long, this is a great choice for your bike!
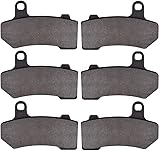
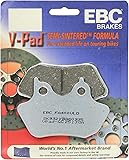
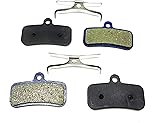
EBC Premium Organic Brake Pads
EBC Premium Organic Brake Pads are the best brake pads for Harley. These brake pads will perform well, last a long time, and provide maximum stopping power. This Premium organic compound is DOT approved and safe to use on all Harley models, which are produced by EBC. It has been manufacturing high-quality replacement parts since 1985.
These brake pads offer excellent protection against heat and improve durability while maintaining even pad wear over time. They will also improve your braking performance during extreme conditions such as cold weather or rain by increasing your ability to stop in these conditions with less risk of skidding!
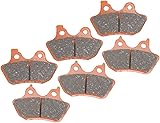
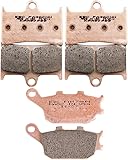
EBC Double-H Brake Pads
EBC Double-H Sintered Brake Pads are some of the best brake pads for Harley Davidson motorcycles. These brake pads feature excellent braking performance, with a long life span. These pads do not wear out quickly, and they will last longer than other brands. EBC Double-H Sintered Brake Pads are made in the USA!
There are many benefits of using these brakes on your bike:
They have a high resistance to heat because of their unique design that pushes heat away from the rotor faster than other brands can do so
They offer great stopping power with little noise from squealing or squeaking noises when you are braking at full force
These brakes perform well even in extreme weather conditions like rain or snow where most other types of brake pads would not work as well
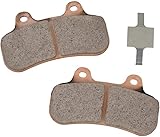
Galfer HH Sintered Copper Alloy Brake Pad Set
Galfer is a respected brand in the motorcycle world, and this brake pad set is made from copper. The company says it’s a “high-performance sintered copper alloy.” It’s also suitable for use with Harley-Davidson Dyna models and Sportster models, but not so much on Softail chassis.
If you’re looking to upgrade your bike’s brakes, this might be the right choice.
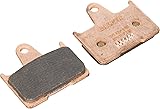
EBC FA174HH Double-H Sintered Brake Pads
These EBC FA174HH Double-H Sintered Brake Pads are the perfect choice for high-performance street bikes. They feature a high friction HH-rated compound that produces hard, fast stops with minimal fade. This means that you can stop your bike quickly, even in wet conditions or at high speeds. These pads also have a low wear rate than any sintered brake pads, making them ideal for high-speed, high-heat, and track applications.
Arlen Ness Big Sucker Performance Filter Kit
In our opinion, this is the best brake pad for Harley. The Arlen Ness Big Sucker Performance Filter Kit features a large filter area to increase airflow. It’s easy to install. The chrome-plated backing plate fits perfectly with your stock cover. Also making it simple to replace your old filters with these excellent new ones. This kit also comes with high-flow filter media that will keep you running smoothly. Also down those dusty roads or dark city streets.
Arlen Ness Chrome Big Sucker Performance Air Filter Kit
Air Filter Kit
This kit is for the Harley-Davidson Sportster 883/1200 models.
The chrome backing plate adds a custom look to your bike and improves airflow, while the breather bolts and mounting hardware give you everything you need to install easily and quickly.
Big Sucker Performance Air Filter Kit
The folks at Arlen Ness know that brakes are integral to a bike’s safety and performance, so they designed this kit with the rider in mind. Its high-quality pads feature excellent stopping power and durability, while the air filter helps to improve throttle response and power. The result is a smoother ride that doesn’t sacrifice any of its speed or finesse.
best brake pads for Harley
The feedback on these brake pads has been overwhelmingly positive, with users saying that they work well on all types of motorcycles. They also work well in a variety of weather conditions and road conditions. This is because brake pads are made from high-quality materials and always provide maximum stopping power for the user.
This is one of the easiest choices for anyone looking for new brake pads to install on any type of motor motorcycle or scooter. There are exceptionally many people who have antique automobiles or strong point automobiles. Where instead they require unique tools. So those options will be used as an aid to work well.
Best Harley brake pads
Mustang Brake Pads
These pads are a great option for those looking to upgrade their current braking system. They are made of a special blend of rubbers. Specifically designed for use on the road and touring bikes The corporations that make them depend on America. This way you will be sure that your products can be made in the factory. And they can be very aware of what they are doing.
The installation process is also simple. So it won’t take hours of your day to try to install these things properly. And if anything happens while you’re riding—for instance, if someone cuts you off on the road or something like that—these pads will last longer than most other brands because they have incredible stopping power!
Check Price
KMG Brake Pads
I’m sure you’ve heard of KMG Brakes before, and that’s because they are one of the most reputable brake pad manufacturers in the world. KMG has been making quality brake pads for bikes since 1987, and they continue to innovate today with their high-quality products. They offer a wide variety of compounds and styles so you can find what works best for your needs.
KMG manufactures both front and rear Harley Davidson models as well as other popular touring motorcycles/cruisers such as the Goldwing/Valkyrie/Shadow series of Honda or Kawasaki Vulcan/Nomad models etc. If you’re looking for an American-made pad that gets great reviews from riders all over then look no further. Use KMG brakes.
Check Price
Hawg Halters Brake Pads
The Hug Halter Brake Pad is designed to match Harley-Davidson motorcycles. Which makes it a great choice for everyone. Which makes it a great choice for everyone to own. Hawg Halter’s brake pads provide maximum resistance and overall performance at a low cost. It is made of high-quality materials that develop a certain hardness for a certain period of life. They also have a long life expectancy, making them perfect for those who want their brakes to last as long as possible without having to buy new ones too often.
Additionally, pads come with a limited lifetime warranty. If they ever wear out or break down before their time expires, you can get your money back. No questions asked!
Here’s A Quick Way To Solve The Best Brake Pads For Harley Davidson Touring Problem
If you’re looking for the best brake pads for Harley Davidson touring, you’ve come to the right place. The best way to solve this problem is to write an article on it yourself. That way, people will be able to benefit from your knowledge and experience in this area. It’s not too difficult a subject when you think about it. There may be information on the best brake pads for Harley Davidson touring out there already, but not enough of it–and certainly not as much as we’d like!
If you’re looking for the best brake pads for Harley Davidson touring, you’ve come to the right place. The best way to solve this problem is to write an article on it yourself. That way, people will be able to benefit from your knowledge and experience in this area.
It’s not too difficult a subject when you think about it: there may be information on best brake pads for Harley Davidson touring out there already, but not enough of it–and certainly not as much as we’d like!
Don’t be scared of the best brake pads for Harley Davidson touring
Don’t be scared of the best brake pads for Harley Davidson touring. There are plenty of options that are better than the stock pads, even though they may be a little more expensive.
There are many reasons why people like best brake pads for harley davidson touring
You may be wondering what the best brake pads are for your Harley Davidson Touring. There are many reasons why people like best brake pads for harley davidson touring. It has a long shelf life and is easy to use.
You can get a lot of money out of the best brake pads for your Harley Davidson touring bike by using them on the road or off the road. They have a great stopping power, which means you will not have any problems stopping your bike when needed and you can use them at any time regardless of whether it is raining or snowing outside!
Reasons Why People Like Best Brake Pads For Harley Davidson Touring
No:1
High-quality braking performance
When you will ride in extreme conditions, you’ll have great resistance. Because great Harley-Davidson Touring brake pads are designed that way. They have a great blend of attributes that allow them to make your bike stop quickly, even when you’re riding at high speeds and coming down steep inclines.
The quality braking performance provided by these pads is one of the main reasons people choose them for their bikes. Top-rated aftermarket brake pads are proven to reduce brake fade compared to many other products while providing superior resistance. This means that you don’t have to worry about having less control over your bike while riding those tough mountain roads because these brakes will be able to keep it under control despite all those twists and turns!
No:2
The best brake pads for Harleys also have fewer vibration issues compared to other brake pads
The best Harley brake pads have fewer vibration issues than other brake pads. The use of materials used in such pads reduces the vibrations caused during braking. An electric sander keeps your ride safe without compromising its performance. Once you ride a bumpy road or bumpy trail, you’ll find that it’s easier to focus ahead instead of being distracted by pedaling with less vibration.
No:3
Noise is almost non-existent thanks to a thin layer of rubber coating on the back plate of the brake pad
The brake pads are made of rubber and the return plate has a thin layer of rubber. This is one way to reduce noise. The rubber absorbs noise and dampens vibrations. So when you put your foot on the brake pedal and apply pressure, you don’t hear as much screeching and jerking as if there were no rubber on the brakes.
No:4
If you want top-quality brake pads, you should opt for ones made with ceramic materials. Not only are they more resistant, but they can handle extreme heat as well
If you want top-quality brake pads, you should opt for ones made with ceramic materials. Not only are they more resistant, but they can handle extreme heat as well. Ceramic materials are stronger and more resistant than other brake pad materials. This makes them ideal for heavy vehicles like motorcycles and cars. In fact, these kinds of pads can withstand up to 1200 degrees centigrade (2200 degrees Fahrenheit). This means that if your car gets into a serious accident, these pads would not melt even if exposed to high temperatures for an extended period of time!
Ceramics also has excellent stopping power on dry surfaces. Its effectiveness is compromised if it rains or snows outside. Because water accumulates its surface becomes slippery. Also, pay attention not to engage in any high-speed braking action since this type of braking requires more pedal pressure than what a normal driver does every day so as not to risk damaging their vehicle’s rotors beyond repair! Never forget how expensive these babies are compared to other brands!
No:5
If you’re looking for something that offers excellent value for money, Hawk Performance is a great option
If you’re looking for something that offers excellent value for money, Hawk Performance is a great option. Hawk Performance manufactures a variety of brake pads for Harley Davidson Touring bikes. The company uses premium materials in the production of its products, which means they are durable and long-lasting. Hawk Performance brake pads are also tested in extreme conditions to ensure that they perform well when exposed to extreme temperatures.
No:6
The factory-installed brake pads will give you optimum stopping power in most situations. However, if you want to enjoy your ride at high speeds, it’s essential that you upgrade your Harley Davidson with better brake pads
The factory-installed brake pads will give you optimum stopping power in most situations. However, if you want to enjoy your ride at high speeds, it’s essential that you upgrade your Harley Davidson with better brake pads.
Decrease noise output when braking.
Provide more stopping power without compromising performance and safety.
Reduce vibration caused by the factory-installed brake pad system.
No:7
Whether you’re looking for extra braking power or just want your bike to stop noise without much effort, new brake pads can help you get there!
Whether you’re looking for extra braking power or just want your bike to stop noise without much effort, new brake pads can help you get there! Remember one thing every brake pad is not possibly to create equality. There are many different types of brake pads out there on the market, each with its own benefits and drawbacks.
For example:
EBC Green Stuff Brake Pads: Brake shoes are specially designed for giving you a smoother ride with less noise than other brands. They also come with a lifetime warranty against warping or cracking, which means they won’t need replacing anytime soon. The only downside? They can be pricey when compared with other options available on the market today (but hey—what price do we place on safety?).
Raybestos Standard Original Equipment Brake Pads (OE): If the value is a disadvantage for you then they are probably really worth considering. They have become popular as a part of Davidson fashion at the highest rate. If something happens while driving around the metropolis chances are it will be a mount before it even leaves the flooring of the production line!
why people like the best brake pads for Harle-Davidson touring
You may be wondering what the best brake pads are for your Harley Davidson Touring. There are many reasons why people like the best brake pads for Harley Davidson touring. It has a long shelf life and is easy to use.
You can get a lot of money out of the best brake pads for your Harley Davidson touring bike by using them on the road or off the road. They have great stopping power, which means you will not have any problems stopping your bike when needed and you can use them at any time regardless of whether it is raining or snowing outside!
There is no shortage of great brake pads for your Harley. Each of these is a good option, depending on what you want in a brake pad or how much you want to spend
5 Strange Facts About Best Brake Pads For Harley Davidson Touring
There is no shortage of great brake pads for your Harley. Each of these is a good option, depending on what you want in a brake pad or how much you want to spend.
Mustang Brake Pads – Mustang is one of the leading brands in stopping power and has been for years. Brakes prices may seem high at first glance, but remember that it’s all about getting the most out of your bike and making sure that it stays safe while riding down busy streets or highways with lots of other vehicles around them at all times during every ride!
KMG offers great products when it comes to installing anything on your vehicle’s chassis. It does not scrape against any surface while going through different terrains. Like a dirt road: where rocks can become embedded in the soil. Old railroad tracks where locomotives ran back and forth during World War II.
Best Brake Pads for Chevy Suburban
At first look, the braking systems of a vehicle may appear to be relatively simple. Slowing down a moving automobile requires a sophisticated and multi-layered process.
The most important part of any brake system is its pads—the parts that physically contact the rotors and work together with the calipers to bring the vehicle to a halt. Brake pads consist of several layers including an outer friction layer, backing plate, and inner lining that creates friction when pressed against a metal surface. This process slows your car down making it difficult to move forward at high speeds. There are different types of brake pads that vary in their materials or manufacturing processes depending on their application; some examples include:
Automobile brakes require force to prevent the wheels from spinning. When you press the brake pedal, hydraulic pressure is created by the brake fluid in the master cylinder. Because pressure is sent to each wheel cylinder after you press the pedal. The calipers squeeze the brake pads against the rotor discs to create friction that helps you slow down your car when needed.
Rotors are metal discs attached to your wheels. It rotates when your car moves forwards and backward. The brake pad is made of a special material that wears off over time. Because it rubs against the rotors during braking events. As this happens, your brakes will lose their ability to stop quickly enough for safe driving conditions; it’s important that you replace worn-out components before you find yourself unable to slow down in an emergency situation!
A ceramic brake pad has been developed for the Chevy Suburban. It is coated with copper fiber which improves its stopping performance. The pads are also more friendly to the environment due to their lack of metal content, which makes asbestos unnecessary as well. The lack of metal in the pads makes asbestos unnecessary as well, which is good for your health and the environment.
Chevy Suburban is manufactured using ceramic material. Because this type of braking material provides superior stopping power compared to other types of materials such as steel or iron. It’s also important to note that while many manufacturers offer both organic and inorganic compounds, it’s best not to go with an organic option if possible because they tend to wear out more quickly than their counterparts made from ceramics or metals such as iron or chromium.
If you have been experiencing problems while braking, chances are that your OEM pads need immediate replacement. Our website offers top-of-the-line products designed specifically for your Chevy Suburban’s make and model
You should consider the following:
Performance and comfort are key considerations when it comes to braking. You want your Chevy Suburban to stop when you hit the brake pedal, but if you choose low-quality pads that don’t match your vehicle’s make and model, this may not happen.
Pads should match vehicle weight and type of use. Cheap pads can wear out quickly, while premium ones will last longer and perform better in all conditions. Make sure that you buy from a quality supplier so that they can help recommend specific products for your Chevy Suburban’s needs.
Check your existing brake pads for contamination before installing new ones; any debris left behind can cause further damage to other components on the brake assembly (such as rotors). It’s especially important if replace one side of the brakes at a time. May contain debris left over from previous owners. If necessary, find an auto repair shop near where you live with experience working on Chevy Suburbans – ask them about how often maintenance should take place as well as what kind of tools we need for each job.
WATCH HOW TO INSTALL BEST BRAKE PADS FOR HARLEY DAVIDSON TOURING
Finding high-quality brake pads can help you save money and time in the long run
Quality
Quality is more important than price. When it comes to brake pads, you want to make sure that the manufacturer has invested in quality materials and a tested design. This means that you’ll get better performance and longer life out of your brakes.
Cheap
Cheap brake pads will typically wear out faster than their more expensive counterparts, which costs you time and money both in maintenance as well as potentially damaging other components within the car like rotors or calipers. You also have to consider how much of an inconvenience this can be when driving around town or on long road trips with friends or family members—you don’t want anything slowing down the fun!
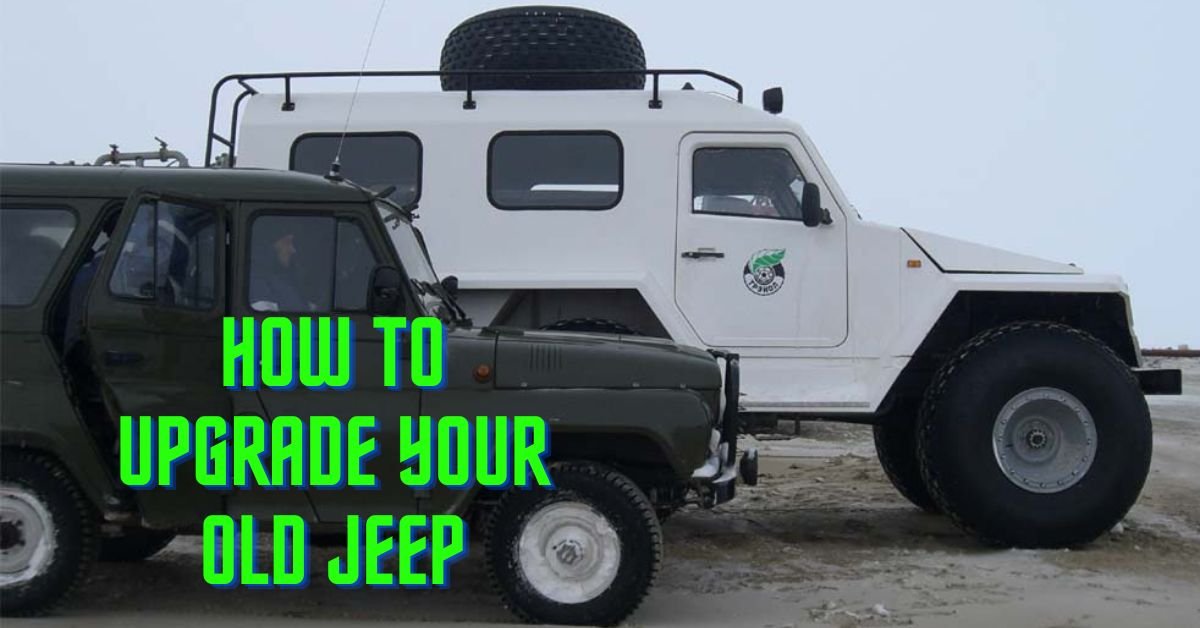
A Jeep is an excellent vehicle for getting around off-road, but it can feel old and dated. There are many ways to keep your Jeep running strong without having to spend too much money.
One way is by installing bigger wheels and tires. It doesn’t matter if the owners want to stick with the stock size or go bigger; either way, they will enhance their vehicle. They may also want to upgrade the engine to take on higher speeds.
So, if you’re looking for the ways you can upgrade an old Jeep into a new looking one, follow along because, by the end of this article, you will learn:
What is a Jeep?
What is the importance of having your old Jeep upgraded?
Types of upgrades.
Exact steps to upgrade your Jeeps.
Let’s dive right in.
What Is a Jeep?
Jeeps are a vehicle that has been popular since the 1960s. It is a four-wheel-drive vehicle with a hollow body, but it can be used as an SUV.
With the introduction of new technologies and upgrades, there is now more to upgrading your Jeep than just installing new shocks and lowering springs.
What Is the Importance of Upgrading to A New Jeep?
Since Jeep is the vehicle used for daily driving, it is essential to invest in the Jeep body to ensure that it is in the best condition.
The Jeep body should be in good condition and should not be in any need of repairs or maintenance. Of course, the body and the other parts of the Jeep would need to be in good condition.
However, you should repair or service the body before making any other changes to the Jeep if it needs repairs or maintenance.
What to Do to Upgrade Your Old Jeep into A New Machine?
For better performance of the Jeep, the electrical system needs to be upgraded accordingly. The first step in upgrading is determining the type of Jeep that one is planning to buy.
There are multiple types of jeeps that one comes across, and based on the types, one can consider the type of upgrades that would be best suitable for it.
Replace the Air Filter
Your Jeep’s air filter should be replaced as soon as possible if you want your vehicle to run smoothly.
The filter is where all the dirt and debris come from. This dirt can build up with time and cause your Jeep to be less efficient. This is where a simple air filter kit is a great way to keep your Jeep running and looking good for years.
Upgrade The Brake
The parking brake is one of the essential parts of a Jeep. When you are stuck on the side of the road or in the middle of nowhere, you use it to stop your Jeep. There is a way to make sure your brakes are working correctly without getting the mechanic out.
If your brakes are not working, make sure the hinges (located on top of the brake pedal) are working. If they are not working, you can replace them. You can also check the caliper and adjust it until it is tight.
You can also check your brakes by pulling the vehicle to the side and checking the pedal. The brake cables should be easily accessible so that you can inspect them for wear. If you are having issues with your parking brake, you can also replace the hardware in the parking brake itself.
Change Wheels and Tires
When you want to convert your old Jeep into a new one, upgrading wheels and tires should be one of the crucial things to do. Get the latest and high-performing wheels and tires that suit your needs. You may want to check out this wheel.
Upgrade Bumpers
Upgrading the bumper is a great way to enhance the outlook right away. So, I’d definitely recommend upgrading the bumpers if you want to bring a stunning outlook. Also, you know plastic bumpers are kind of useless and fail to help from a collision- so from a safety perspective, the value of bumpers increases tenfold.
Are you struggling to find beautiful bumpers?
Upgrade The Roof Rack
I use the roof rack mainly for skiing in the winter and camping in the summer. This model of roof rack is ideal for both. So, why not have a try upgrading your roof rack?
Upgrade Lift Kit
Lift kits allow you to add larger tires that are more suitable for off-road driving and increase your Jeep’s ground clearance, suspension travel, and ease of access. As with wheels, you should choose your lift kit based on your intended use for the Jeep. Are you struggling with upgrading the lift kit? Give me a call. Check out this lift kit.
Change The Winch
Your Jeep may have gotten stuck while off-roading. For off-roading adventures, a winch is essential. Choose a winch with an appropriate load capacity if you plan to tow something heavy or powerful with your Jeep.
Get New LED Lights
It is a worthwhile investment to install high-powered LED headlights and fog lights to increase visibility nearly twice as much as factory headlights. Additionally, you can use them to set up camp, repair a car, or throw a party.
Focus On Maintenance and Learn These
There are many things you need to know about your Jeep, including how to operate it safely.
For example, you should know how to turn the key in your ignition and how to start your engine.
You should also know how to steer your Jeep when driving on a paved road properly.
For example, you should know how to check if your engine is overheating, whether your battery is dead, or your cooling system leaks.
A few other things you should make sure you know how to do are:
Upgrading a jeep is a great way to save money and simultaneously experience the latest features. Throughout the article, I explained why it’s important to upgrade your old Jeep and how you can upgrade it.
I hope this helps. If you got any questions unanswered or are confused about anything, feel free to comment below.
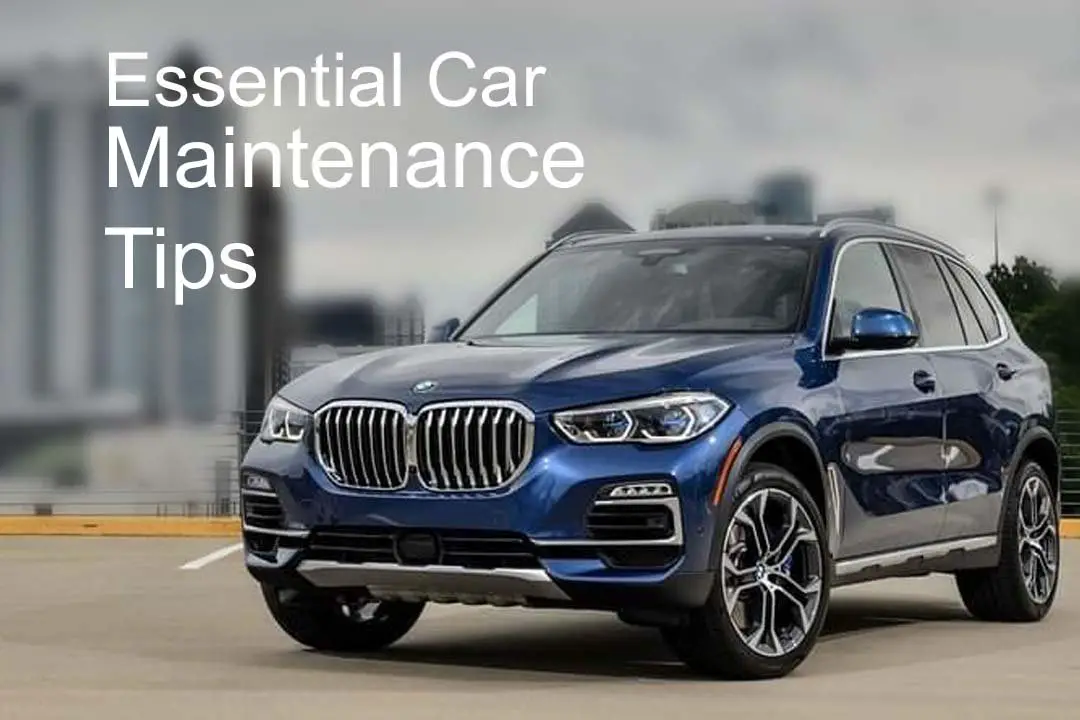
Cars are wonderful machines, capable of transporting us to faraway places in a short amount of time. Because cars are so amazing, it’s essential to take care of them. Every car owner should know about the basic maintenance tasks for cars.
You know you need to change your oil and make sure the tires are properly inflated. Also, wash and wax your car at least once a month and check your cabin air filter. Over time these practices will help extend the life of your vehicle and save you money on costly repairs.
Whether you’re driving your car for the first time or have had it for years, there are always things you can do to keep up its health and prolong its life.
Here’s a list of 10 essential car maintenance tips that will help extend the life of your vehicle.
The Best 10 Essential Car Maintenance Tips For You
No.1
Check Your Tire Pressure Regularly
One of the most dangerous things that can happen to your tire is running over a nail. When this happens, it will make the tire go flat and give you a hard time trying to change it.
With many pins around streets and highways, it’s essential to check your pressure regularly to avoid getting a nail stuck in your tire. Keeping it inflated correctly will help extend the life of your tire and also prevent a dangerous blowout.
When checking your tire pressure, you should do it with a quality gauge that can provide an accurate reading. This means that they must be calibrated regularly to guarantee accuracy.
No.2
Keep an Eye On the Oil Level In Your Car
Another common cause of engine failure is low oil levels. That’s why it’s essential to check your car’s oil regularly. It should always be between the two lines on the stick. If it’s below or above them, that means that you need to add some or remove some oil, respectively.
By keeping a close eye on the oil levels, you will avoid adding too much or removing too much, which could cause damage to your engine. You can check your car’s manual for instructions on how often you should change it.
No.3
Get into The Habit of Checking for Signs Of Wear And Tear
We understand that most drivers are in a rush. But taking just a few minutes to check your car before you drive is always better than risking an accident.
Make checking for loose parts or tears on the tires into a habit whenever you get in your car. Balding tires, loose parts, and patches coming off the tire are signs of wear and tear.
It’s essential to do this every time. If any of these things happen, you can prevent them from becoming a bigger and more costly problem by taking care of them right away.
No.4
Inspect Your Brakes Frequently
You should inspect your brakes regularly to make sure they’re not wearing down too quickly. If you notice the indentations on the rotors becoming shallower, it means your brake pads need to be changed because they’re low. But if they’re not changed in time, the rotors can get damaged, and you’ll be risking an accident.
Also, check if your brake fluid has enough level. If it’s low, add more to avoid damage or the risk of stalling while driving on steep hills. Make sure you have a quality brake fluid to ensure it doesn’t affect your braking.
No.5
Keep Your Car’s Fluids Topped Off
It’s important to check your fluids regularly. This includes checking the level of brake fluid, engine oil, and coolant. Your owner’s manual will indicate how often you should check them so you can avoid running out.
Running an engine or car with little or no oil can lead to severe damage. Not to mention that it could also affect your braking. Make checking the oil level in your car a habit, and top it off whenever you run low.
If you’re driving on the highway frequently, it’s essential to keep an eye out for rocks or debris that could damage your undercarriage. A stone chip or crack can cause leaks in the cooling system leading to overheating.
Check under the car for oil leaks or other damage, like loose hoses or clamps, which can lead to further problems.
If you notice oil stains under your car, check your engine to ensure that it’s not leaking oil. But if there are no signs of leakage, but you’re still finding traces of oil, then take your car to a mechanic. You could have hidden engine damage that can be costly to fix.
When your car makes strange noises, it’s usually a sign of something wrong with the bearings or rotors. If they’re not fixed soon, the noise will only get worse and become highly annoying.
No.6
Change Spark Plugs When Needed
The spark plugs are also an important part of your car that needs to be checked on a regular basis. You can check them yourself by removing one or two of the old ones with a socket wrench. If you have trouble, take it to a professional, so they don’t strip the bolts.
Your owner’s manual will indicate how often you should change your spark plugs, which is usually around 60k miles. If you wait too long, the spark plugs can wear down and become damaged. When this happens, your car will not run as well as it should.
No.7
Replace Your Air Filter
Replace your air filter once every 12,000 miles to keep your car running at optimum efficiency. If you drive a lot during the winter months, consider changing it more often. That’s because of all the salt and sand that gets kicked up onto the roads.
This is an integral part of your car’s maintenance that not many drivers know about. While you might not think it’s doing anything, the air filter is actually responsible for the airflow into your car.
If it gets clogged up with dirt and debris, it won’t be able to suck enough oxygen into the engine to keep it running at its best. This will affect your gas mileage and performance on the road.
No.8
Get A Professional Tune-Up
Getting a professional tune-up twice a year is another critical step of car maintenance. This will make sure your car’s spark plugs, filters, and oil are all changed on time so you can avoid damage or costlier repairs down the line.
If you’re not great at doing these things yourself, hire a professional to do it for you. It’s always better to be safe than sorry when it comes to your car. So take the time to make sure all of these services are done!
No.9
Keep Your Car Clean Inside and Out
Regularly cleaning your car is one of the best ways to protect it from damage. Keeping all that dirt and debris off your paint job will also help extend its life. This means you’ll have a better-looking car for much longer!
Make sure to wash off any chemicals you might accidentally spill onto the exterior. They could eat away at the paint job. If your car is really messy, take it to a professional detailing service. They can get rid of all that dirt and grime safely.
On the interior, you’ll want to vacuum out your floor mats and upholstery from time to time. You should also make sure there aren’t any spills on the seats or in the trunk.
No.10
Keep Your Car Clean Inside and Out
If you ever get stranded on the side of the road, having an emergency car kit will make sure you’re prepared for anything.
The kit should include jumper cables, flares or triangles, a flashlight with extra batteries, a first-aid kit, tire inflator, extra gas (in case you run out when you’re on the side of the road) and any other tools or parts that might come in handy.
This is especially important during the winter months. That’s because weather conditions can put you in grave danger if your car breaks down.
Be sure to take care of your emergency kit every few months by checking the batteries, replacing anything which might have gotten wet, and filling it with new extra supplies.
Wrapping Up
The most important thing to do is check your owner’s manual or talk to a professional when it comes time for car maintenance. This way, you can keep your car running in tip-top shape and avoid costly repairs down the line. It might seem like no big deal now, but eventually, these minor problems will pile up and become much bigger burdens.
If you don’t know how to do any of this stuff yourself or can’t afford to take it to a professional, there are always alternatives! You try following these 10 essential car maintenance tips.
You also ask your friends or family members for help. You don’t know when you could get in an accident. So, it’s always better to be prepared than sorry!
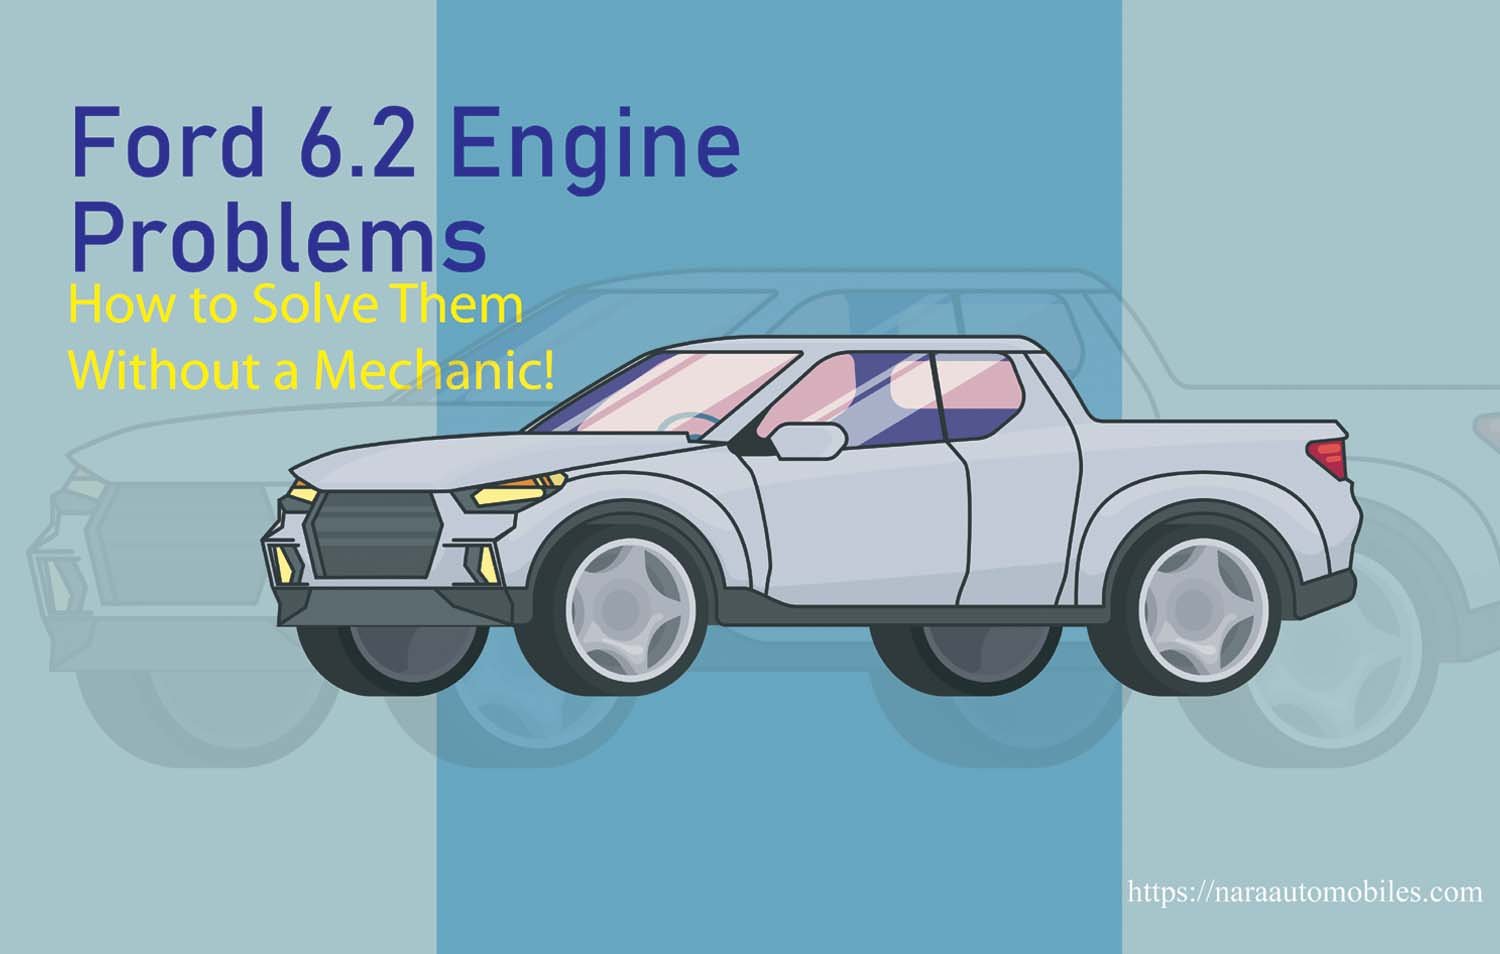
If you own at least an old Ford V8 truck, you must’ve plenty of ideas about the famous 6.2 engine Ford produces. This engine is one of the most iconic and widely used in different vehicles produced by Ford. Now, even though the engine is a classic and trusted one, it’s not free from occasional issues. For years, owners have been trying to figure out Ford six point two engine problems and the reasons behind them.
So here we are! In this piece, we are going to list down some of the common problems that the Ford 6.2 engine faces and how to solve these on your own!
Let’s go!
What Are the Common Ford Six Point Two Engine Problems?
Even some of the most expert car owners don’t have a clue what’s going on in the engine while you ride. It’s kind of the powerhouse of your vehicle, and it’s the only thing that keeps the entire vehicle on the move. If something happens to the engine, it’s going to affect the performance of your car or truck.Now, if you have the idea of how exactly the engine can run into problems, it gets easier for you to solve. So, in the case of the Ford 6.2 engine, we have figured out 5 common problems that you may run into.
Rough Idle
Faulty Valve Cover Gaskets
Malfunctioning Valve Springs
Oil Burning
Vacuum Leaks
Now, let’s find out some details on these 5 problems.
Rough Idle – A Sudden Stop
When you are riding your vehicle pretty smoothly and all of a sudden, the vehicle stops with a stalling; this is commonly known as rough idle.
The possible reasons may include
Damaged spark plug
Uncleaned air system
Uncleaned throttle
How to solve it?
The most common reason for a rough idle is the dirty air system. Oil and water can sometimes enter the system and cause it to malfunction. Here’s what you can do to keep it clean.
Get a throttle body cleaner spray bottle which will cost you no more than $9.
Remove the hose from the airbox of the engine
Now turn the engine on and start spraying the cleaner in the hose
Now unplug the mass airflow sensor and clean it up with the cleaning spray
Put everything back into the place, and you are done.
Broken Valve Spring – Warning Knocking Sound
Ever found out that the engine is making a weird knocking sound as soon as you turn it on? Well, that’s what probably a broken valve spring is responsible for. This will definitely damage the engine in the long run, so you got to take action ASAP.
The only safe solution here is to replace the valve spring. To do that, you need
Valve spring compressor
A ratchet
Drill
Magnet
Air pressure
How to replace the spring?
Open the car hood to gain access to the valve spring area
Remove the valve cover and use the drill to take the rocker arms off
Take out the guide plates and the rods. Be careful as they are going to be wet.
Now apply air pressure to remove the valves
Use the valve spring compressor to take the springs off
Replace it with a new valve spring
Place all the parts together
Oil Burning Problem – Unusual Fuel Consumption
One of the most common issues for a Ford 6.2-liter gas engine is it burns oil like crazy. Now, if it’s getting out of hand, you better let an expert mechanic handle it. However, if a clogged and old PCV valve causes it, you can try replacing it on your own.
All you need is to buy a PCV valve that won’t cost over $10.
How to Replace the PCV valve?
First of all, you have to remove the case and locate the valve
Pick the valve that is around the intake manifold
Use a set of pliers to take the PCV valve out
Now take the hose out from there
Take a socket and use it to replace the valve with a new one
Finally, connect the vacuum line, and you’re done
Vacuum Leak Problem – The Scary Hissing Sound!
A vacuum leak can be really hurting for your vehicle in the long run. If you can hear a hissing sound when you are turning the engine on, it’s possibly because the engine has a vacuum leak.
Now, if you were to visit an expert, they would use expensive machines to spot the leak. As for you, you won’t be able to use that machine, can you? So, here’s what you can do to spot the leak.
First of all, wait for the engine to become cool
Now visit the area of the probable leakage and take the vacuum hose off
Place a loose hose in that place
Now light up a cigar and blow the smoke into the hose
Observe the engine to find the smoke
This way, you can find the area where the leakage took place
Now, you need to take it to the experts to repair this leak because it’s not easy to repair on your own.
Oil Leak – Unusual Oil Spilling from the Engine
Another issue with a Ford 6.2 engine is an oil leak. The primary hint that you get from an oil leak is unusual oil consumption. The engine will drink up more oil than usual.
So, to solve the oil leak issue, you need to replace the valve cover gasket. Take a ratchet ad a wrench that can be used to loosen the brake booster vacuum line. Most Common Problem: Broken Valve Springs.
So, here’s what you should do.
Remove the air filter cleaner, the PCV valve hose, and the brake booster vacuum by using the wrench
Use the ratchet and get rid of all the bolts on the valve cover gasket
Replace the old cover with a new one
Once you’ve done it, replace all the parts that you have removed, including the bolts
That’s it! You will see fewer oil-leak from now on.
How to Fix Engine Oil Leaks in Your Car
Final Words
So, these were the 5 most common Ford 6.2 engine problems and how to solve them. Remember, if you’ve got all the necessary tools and a bit of experience in opening up the engine case, only then should you attempt these solutions. If you are not that expert, nor experienced, it’s better to contact an expert mechanic to get the job done for you.
A problem in the engine can cause your vehicle to incur damage at a major level. This issue is usually caused by the computer of the car, also commonly known as the ECM. You can reset the whole computer just how you reset your phone when it’s prone to damage at times like this. But you might ask, why and how to reset the car computer?
The ECM or the car computer performs some of the most important functions like- checking the oxygen to fuel ratio, tracking idle speed, controlling the valve timing, etc. When these components face an issue, it can cause damage to the engine. Hence, it’s recommended to reset the ECM. And you can reset it in a bunch of ways.
So, if you want to learn more about how you can reset the ECM and why you should reset it, keep an eye on this article as I’ve highlighted all the details that will help you.
What is a Car Computer and What Does it Do?
If there’s a brain inside your car, that would be the ECM or the Engine Control Module. It works as the computer of your car by storing long-term data inside its term memory.
The ECM controls the other modules to make your vehicle perform at its best by learning everything about your driving habit.
The ECM performs several functions that ensure the smooth operation of your vehicle. These are:
Checks the oxygen to fuel ratio for which, it knows everything about the coolant temperature to the proportion of oxygen.
Tracks idle-speed
Controls the variable valve timing
Increases the power by controlling the ignition timing
Manages emissions and fuel economy of the engine
Gather useful data by using different sensors
Ensures low emissions and best mileage
Why You Should Reset Your Car’s Computer
Your car’s engine is nonfunctional without the ECM. It plays an essential role by reading the behavior of the engine.
The ECM is called the car’s computer as it calculates the data of your engine sensors and tracks data simultaneously. It stores trouble codes, which helps to identify the part of the engine that needs repair.
And so, all these functions can stop when there’s an issue with the ECM. Thus, you won’t be able to enjoy the true capabilities of your car.
A quick solution to this problem is to reset your ECM. This procedure will erase its long-term memory, which holds all the trouble codes and faulty data. As a result, the data turns into default and ensures the smooth functioning of the ECM.
Many people tend to change the battery of the engine as a solution. But even after replacing a battery, there might be a need to reset the ECM.
What are the Symptoms of a Failing Car Computer?
When there’s an engine failure, it’s usually due to a faulty car computer. And the failure of this important component will put your car at heavy risk.
So to stay cautious, you should always look out for signs that might indicate these issues.
Some of the common symptoms of a failing car computer are:
Check Engine Light
If the check engine light continuously flickers or stays turned on, there’s a high chance your car’s computer isn’t working. When the computer fails to record a problem with its components, there could be an issue with the ECM.
Burnt Smell
Whenever you come across any burning smell, always investigate your ECM first. This is one of the common symptoms that can be noticed when there’s an issue with the ECM for heat and overload.
Engine Issues
You might experience engine issues like- poor timing and acceleration, decreased fuel economy, low efficiency, etc. The performance of an engine significantly lowers when there’s a malfunctioning ECM.
Unsteady Behaviour
The engine of your car can misfire, jerk, and stall suddenly. This unstable behavior can be seen when the computer of your car has problems.
How To Reset Car Computer?
Resetting the car’s computer will restore its default setting and clear the issues of your car. And the fun part is, you don’t need a mechanic or a professional as you could do it yourself.
There’re three ways you can reset the car computer yourself. They are – reset without disconnecting the battery, reset after replacing the battery and reset using a code scanner.
How to Reset Car Computer Without Disconnecting the Battery
To reset your car computer without disconnecting the battery, you will need a couple of equipment– a code reader and fuse puller. Instead of fuse pullers, you can also use a pair of pliers. So, the process is-
Locate the fuse box that has various fuses and corresponding amperage.
Use the fuse puller to remove the fuse and pull fuses named ‘back-up’ with 7.5A.
Locate fuse named ‘ECU’ and pull out with 15A.
Keep the fuses disconnected for 10 minutes and then reinstall them with the ECU.
Put the fuse cover back and test your care by driving it for a few minutes.
Keep in mind to see whether the check light engine illuminates or not. If the light stops, then your car is as good as new.
The Process to Reset Car Computer After Replacing Battery
Replacing the battery might seem like a solution. But, the ECU might still need resetting. So, After replacing the battery, you can reset the car computer by disconnecting the battery.
You’ll need a battery wrench, insulating tape, or cable tires to start this procedure. Don’t forget to turn off the engine before starting. Here’s how you do it.
Spray on the battery to remove corrosion and terminals.
Disconnect the negative and positive battery cables by a combination wrench.
Hold the positive cable against the end of the negative cable in a way that won’t touch the battery. And bind them with insulating tape.
Wait for 5 minutes for the old data to get erased.
Test it out by driving for 10-20 minutes.
The procedure will be successful when the check light engine isn’t on after the test drive.
How to Reset Car Computer Through a Code Scanner
The OBD (On-board Diagnostics) code scanner can be used on all vehicles made after 1996. You can either purchase it or borrow it from a friend or family. The process goes:
Locate the port where you can insert the OBD scanner.
Connect the cord linked to the scanner to the port.
Put the key to the ignition and turn the switch of the vehicle on. Don’t start the car whatsoever.
Turn off the car’s accessories when the lights on the dashboard turn on.
Press ‘Read’ to get access to the check engine light code.
Record the code that appears as it will represent the required repairs of your vehicle.
Press the ‘erase/clear’ button and wait to see a ‘No code’ signal.
Turn off the car and disconnect the scanner.
After taking all the steps, make sure the check engine light doesn’t turn on– that would mean it worked.
Conclusion
Resetting the computer of a car can save the vehicle from facing further failure. Without this computer, the normal functions of your vehicle will stop. Hence why you must know how it’s done.
That’s why I’ve answered everything about why and how to reset a car computer. Now, you can reset your car’s computer yourself when there’s an issue with it.
It is hard to resist driving a motorcycle on the open roads for fun when you are a motorcycle fan. But you must be vigilant about your safety on the streets. So, when should you not ride a motorcycle?
The two factors determining when you should not ride your motorcycle are your health and the weather. To ride your bike, you need to be fit, both mentally and physically. Riding a bike requires focus. When the weather is rough, it is hard to keep balance on a bike. You should not ride a motorcycle in stormy weather.
Riding a motorcycle might be a cool thing. But you should be concerned about when and when not to ride your motorcycle. This article will help you to know all about it in detail.
7 Reasons When You Should Not Ride A Motorcycle
There can be lots of reasons and conditions where you should not be riding a motorcycle. Among them, these seven reasons should never be overlooked under any circumstances. Here’s a basic rundown for you.
Health Issues
Riding a motorcycle is said to be the most technical form of road riding. You need to be at the top, health-wise, to ride a bike. Any kind of minor disease can hamper your riding balance.
On the other hand, there are some health conditions where the doctor forbids riding a motorcycle. Let’s look at a few.
Heart Disease: Riding a motorcycle with a heart condition can deteriorate heart health. Even if it is a minor case, this can get pretty bad.
Back Pain: If you have back pain, riding a motorcycle can increase the issue. You need to sit tight in a particular posture for a long time while riding a bike. This can affect your backbone.
BoneFracture: You need to use your hands and legs continuously to ride a bike. While having a fracture in your bones, it is impossible to ride a motorcycle.
MusclePain: Having muscle pain will have the same effect as bone fracture while riding a motorcycle. It will tamper your balance while riding, and the continuous use of muscle will affect the pain.
MigraineOr Any Other Form Of Headache: While having a migraine, the noise of the motorcycle or the jerking from the bike can affect the pain. It will result in an increase in pain. Thus the rider will end up losing control. This fact is true for all kinds of headaches.
Any Sort Of Medical Operation: No one is allowed to drive a motorcycle if they have any medical operation. They are permitted to ride a motorcycle neither as drivers nor as passengers.
Emotional and Mental State Issues
Balancing a motorcycle needs total concentration. You will need to balance it with your motor control. You need to keep your eyes on the roads, follow the looking mirrors, listen to horns, and balance the motorcycle.
For your brain to balance all the above activities, you need to be in a soothing place emotionally. Any sort of emotional and mental issues will hamper your motor balance.
It has been medically addressed that most motorcycle accidents are the cause of unstable emotional states. Emotional instability doesn’t mean sadness only. Being excited about something can also cause a ruse of Dopamine. This can also cause going over the speed limit.
Any sort of hyper-emotional states like sadness, excitement, stress, or hypertension can cause a motorcycle accident. Thus you are asked to avoid riding your motorcycle in such conditions.
Harsh Weather Conditions
Harsh weather conditions are also significant factors in riding a bike. Heavy snow or rain will make the road wet and sloppy. A motorcycle is a two-wheel ride. In these kinds of conditions, it is challenging to keep balance on the ride.
Heavy rainfall or foggy weather can limit your eyesight. Mostly rainy weather can be much of a danger.
A motorcycle doesn’t have a windshield wiper. When the rain hits, it tampers your eyesight. You will not be able to see what is coming towards you or where you are heading.
The same assessment is applicable for foggy or snowy weather. It will not make the road sloppy but will also compromise your vision. You will not be able to properly follow any vehicle coming towards you or where you are heading.
You might think of using your headlight, but it will not be much of a help in these cases. No good tires can ensure 100% protection from the sloppy road. Thus to have a safe ride, you should not ride during harsh weather conditions.
Windchill Factor
The wind chill factor is a very technical issue. It means when you pass through the wind, it is low in temperature and reduces your body temperature.
The risk factor is that while the average temperature of the surroundings might seem high, passing through the winds will make you freeze.
When you ride through the wind, your body temperature will reduce continuously. Your body parts will start to feel numb. You might even begin to get brain freeze in severe conditions. The chances of losing motor control are higher in this case.
Thus, it is a high-risk factor to ride your motorcycle through windchill.
Extreme Heat
Just like the cold, rainy, or foggy weather, extreme heat can also cause severe issues while riding a motorcycle. During extreme heat there riding a bike can cause dehydration. Dehydration has been shown as one of the major causes of losing control in hot weather.
Also, extreme heat causes mirages in the road, resulting in motorbike accidents. It has also been addressed that high temperature causes tire burst and sudden engine failure.
Thus, one should not ride a motorcycle in extremely heated weather.
Motorcycle Condition
When you are riding, you need to remember that the motorcycle needs to be in proper condition. You should never ride a bike, even if it is showing the slightest issue in performance.
You need the break, engine, oil receiver, wheels, and every single mechanism to be working in top-notch condition. You should also not ride your motorcycle if a single light is defective.
10 Safety Tips When You Ride a Motorcycle
Safety is a must while riding a motorcycle, even in favorable conditions. Here are ten safety tips you can follow to have a safe motorcycle ride.
Learning about safety: Before riding a motorcycle, learn about the safety measures. Also, gather explicit knowledge about road safety and traffic rules.
Look at the weather forecast: Get a clear idea about the weather during your drive time. Take proper measures according to that.
Wearing protections: Make sure to wear motorcycle gear, including helmets, goggles, hand gloves, knee pads, over ankle boots, leather pants, and jackets.
Check your bike: Before starting your ride, have a proper check of the engine, Mobil, oil, tires, lights, mirrors, brakes, and every technicality. Make sure to use the best motorcycle battery for your bike.
Obey rules: Always remember to abide by the traffic rules and speed limits. Every road has a speed limit for a reason. Never cross that.
Stay visible: Make sure not to drive in a blind spot. In such cases, use a headlight to become noticeable to other passengers on the road.
Keep an eye on the road and sides: Keep your focus on the road while driving. Be extra careful about the crossovers.
Maintain a safe distance: A safe distance is to maintain from the other vehicle. By this, any sudden movement will not affect your driving.
Have first-aid: No matter where you are going, always carry a first aid box. In case of an emergency, it might end up saving your life.
Learn how to ride properly: Before hitting the road, complete your motorcycle lessons correctly. Acquire the proper techniques to drive as much as possible.
Final Words
To have a safe ride, you should always know when you should not ride a motorcycle. Follow these pointers, and you should become well-aware of the topic.
In this post, we tried to tell you about the scenarios and inform you of the reasons behind choosing them. Hopefully, your future motorcycle ride will be helped by this. Ride safely, being careful on the roads!
The idea of putting wheels under a flat piece of support was the first technology that changed the entire way we thought about movement. Today, every single day is marking a new milestone of developing that very same technology, one step at a time. From HD vision of who’s behind you to driverless riding – our perception of how we ride is changing every day. Every man should know about car safety technology.
However, new technology doesn’t always mean better or safer technology. It simply depends on the user how exactly he is going to take advantage of it. Even driverless cars are subject to accidents here and there right now.
That being said, today, we will look at three of the latest technologies that can actually make your car safer. It’s no clickbait, rather the reality. Let’s check them out!
Obstacle Avoidance Technology
Trust me; this is going to revolutionize how we drive and behave on the streets. When you are riding a car, you can only see what’s happening in front of you and your sides through the windshield and the side windows.
However, whatever happens behind your back remains a mystery that could only be solved by the rearview mirror some decades ago. But today, almost all cars have camera systems set up on the back and the sides for optimum clarity and visibility.
This is how the blind spots are being opened up for the driver by using technology. Although cameras do ensure that you see what you couldn’t see normally, this doesn’t ensure any safety. It’s up to you to view it or not.
That’s why technology had the space to improve and develop. This is how sensors evolved. The blind-spot monitoring system can alert you if there’s any car within the blind spot and about to push your vehicle. It will automatically make you aware, and you can take prompt action.
Similarly, there are other sensors that work towards ensuring safety.
Electronic Stability Control System
This system isn’t something new for some of the advanced cars nowadays. The fact that it has been there since the ‘90s indicates that it’s almost three-decades-old technology. This system alerts you when there’s a skidding going on or about to occur.
The system will automatically control the vehicle and make it stable when you are skidding on the street. This eventually prevents accidents.
Lane Detection System
It’s very crucial to stay in your lane when you are riding your car. A sudden change of lane can be deadly once the vehicle comes towards you or from your back. Especially on the highways, keeping it out of the lane means a serious crash between cars.
Another such control system is this forward collision warning. If the sensors can detect a possible collision, they will promptly send signals that you need to take care of the situation and prevent the collision right now.
Some versions of this technology can also take control of the vehicle itself and allow the car to brake immediately to save the rider from a deadly accident.
Automated Technology
The technologies that we have talked about till now are all automated and self-driving. This is the future of vehicles. Automatic systems can make your riding experience even smoother and more enjoyable.
Apart from these, there are many more automatic systems for cars that are emerging right now.
Automatic Light: The automatic light option can turn itself on when there’s darkness around. You don’t have to manually turn the lights on when you’re passing through a tunnel, or there’s a sudden rain with dark clouds up. Similarly, the lights will turn themselves off when there’s natural light around. How to Replacing Faulty Lights?
Self-Parking: Big companies have already implemented this AI-based parking system. Once you move your car towards a suitable parking space, the car will automatically park itself. The sensors on the car will determine and detect the obstacles and objects around it to park without hitting anything.
Self-Driving; This is the newest technology that has been introduced by some giant vehicle companies. It doesn’t even need a driver to drive the car. The car is full of sensors that can measure and detect every single object around it to run through the traffic and safely reach the destination. You can even be in the driving seat and turn on auto-pilot mode to enjoy the advancement of technology.
Reactive Features
Sensors are there to react to the situations around them. This is how car companies have been using reactive features in their productions. Some of the recent reactive features include adaptive cruise control and adaptive headlights.
Adaptive cruise control can easily detect and measure the vehicles ahead and alter the speed of your car. You don’t have to change the gears by yourself manually. This way, you can maintain a steady speed for as long as you need.
An adaptive light system also determines the natural lighting around and adjusts the illumination of your vehicle. This is also based on artificial intelligence and takes prompt action as needed.
Final Words
The more we find out our potential to invent, the more advancement we are making in our lives. Vehicles and transports are no exception. Even the essential fuel is no longer essential today due to the evolution of electric vehicles.
However, technologies are beneficial only if we are in control. Gear-free technology is going to cause more havoc than a blessing. It’s equally true for the 3 technologies that we have mentioned here, too. If you are a tech-savvy guy, you better prepare yourself to adapt to these highly innovative technologies that are surely going to change the way we keep our cars safe.