Author: naraautomobiles2021

  • How to change an alternator?

    How to change an alternator?

    Like the battery powers up some of the parts of the vehicle when the engine is off, the alternator does this same job while it’s on. A car alternator recharges the battery itself to keep it going. Plus, it also powers up a few electrical parts of the vehicle, as well. So, if you are noticing a dimming light or reduced interior lighting once in a while, it’s time to check the alternator. A faulty alternator can put you in serious trouble. It can cause the battery to die and leave your car at sideways like a dead moose. So, before you get into this kind of trouble, it’s better to replace the alternator. But if you don’t know how to change an alternator, don’t worry. That’s why we are here to help.

    So without further ado, let’s gear up!

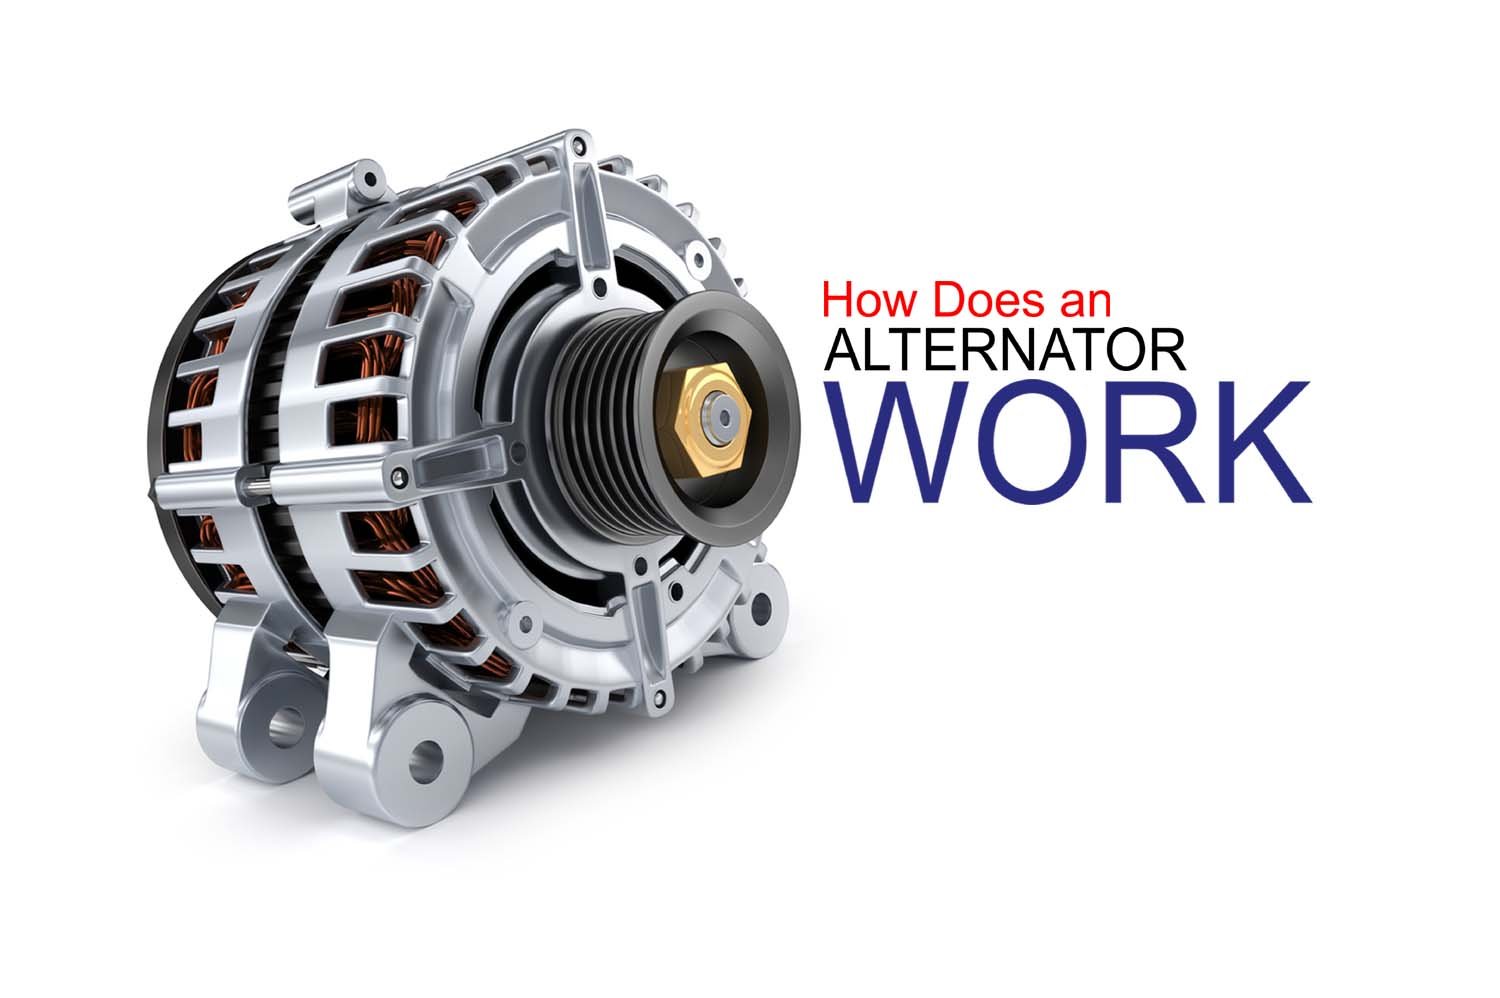
    What Is An Car Alternator?

    An alternator is a type of electric generator that is used in modern vehicles to recharge the battery inside and power up a number of electric parts of the vehicle. It worlds while the engine is running.

    How Long Does It Take To Change An Alternator?

    How-Long-Does-It-Take-To-Change-An-Alternator

    Generally, it takes only about a couple of hours to change an alternator. However, it depends entirely on the mechanic you are going to. If he is expert enough, it may take a little less time.

    What Tools Are Needed To Change An Alternator?

    What-Tools-Are-Needed-To-Change-An-Alternator

    You need a number of tools to change an alternator. Such as

    • An Alternator
    • Belt tensioner
    • Basic hand tools
    • Voltmeter
    • Replacement serpentine belt
    • Rags
    • Gloves
    • Ratchet
    • Wrench

    How To Change An Alternator – 3 Main Phases

    Following only three simple phases, you can change and replace the alternator of your car or vehicle. Here’s how.

    Phases-1 Disconnecting the existing alternator

    Disconnecting-The-Existing-Alternator

    Step 1: First of all, park the vehicle on a flat surface where you can be sure that the car is not moving or trembling at all.

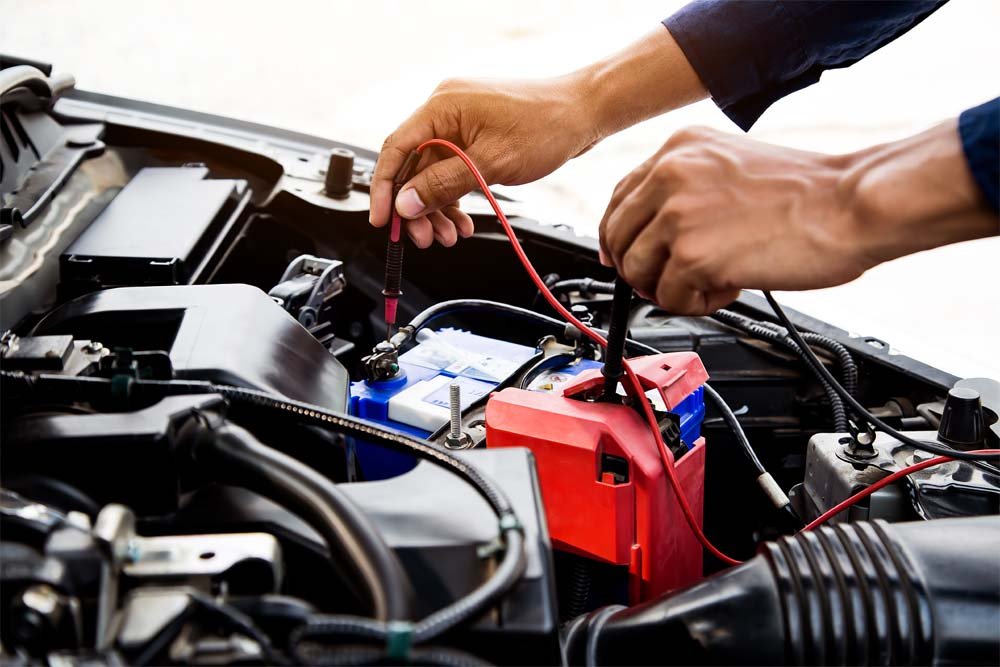
    Step 2: Now, you have to loosen the bolt that maintains the cable where the negative tight of the terminal is placed. Find a suitable socket for this removal. When you loosen the bolt, simply take the cable out of the terminal. This will disconnect the battery. It’s okay to keep the positive cable as it is.

    Step 3:  To find out where the alternator of your car engine is located, you can simply follow the accessory belts or the serpentine. It may be placed on the closest part of the top from you or even be on the sides. Usually, you may have access to the alternator through the engine bay. If not, you may jack the vehicle up to do so.

    Step 4: Now, you need to disconnect the main power cable. It’s the thick cable that is attached to the alternator, which comes from the car cell. Apply a ratchet or wrench to unscrew the bolt and pull it out from the connection.

    Step 5: Lastly, you need to release the safety clip that is attached to the wiring harness. You can use a flat-head screwdriver or simply use your finger to release the clip.

    Phases-2 Removal of the existing alternator

    Step1: If the vehicle has an auto-tensioner, you need to relieve the tension on the belt. Simply insert the breaker bar’s square drive into the auto-tensioner pulley’s hole. Then you need to put a clockwise pressure to relieve it.

    If the vehicle doesn’t have an auto-tensioner, you can then relieve the tension in an easier way. All you need to do is loosen a couple of bolts that hold the alternator to the vehicle engine. Use a 14 mm socket if it matches. Otherwise, you may need to apply different sizes of sockets.

    Step 2: As you have loosened the tension, now inspect the belt for any kind of damage. Investigate if there’s any glazing or glossing on the belt – both the edges and under the belt. Also, you should look for cracks, as well.

    Step 3: Now, carefully take the alternator off the engine. As the belts are already removed from the pulley and the wires are previously detached, the alternator will slide out quite effortlessly.

    Phases-3 Installing the new alternator

    Step 1: Okay, so now you have to put the new alternator in its required place. You may need to move the device up and down to place it back as the space is quite tight. Hold and move the serpentine belt and other wires out of the way while you place it.

    Step 2: Now, pass the mounting bolts via the alternator and place them into the mounting bracket. After that, tighten these bolts up. If you can’t tighten these up completely, it’s not a problem. Just make sure they are not too loose. Then, use the old belt or get a new belt to run through the suitable pulleys.

    Step 3: It’s time to apply tension to the alternator. If your car doesn’t have an auto-tensioner, you have to put pressure on a screwdriver. Alternatively, you can use a pry bar, as well. Use it till the belt gets tight enough. To do this, you need to place the bar in the middle of the engine and the alternator.

    Step 4: Now that you have applied the tension, it’s time to tighten the mourning bolts. Use suitable sockets for this job. It will make sure that the alternator maintains the tension on the belt.

    Step 5: In this step, you have to connect the monitor harness to the power cable. Follow the same manner you followed while you removed both of them.

    Step 6: Now that it’s done setting the new and fresh alternator, you need to reconnect the negative lead to the vehicle cell. Make sure you are tightening it well so that it won’t loosen while the vehicle is moving.

    How To Repair An Alternator

    If you don’t want to get a new alternator and replace the old one, all you are left with is an option to repair the existing one. However, it’s not an easy task at all to repair an alternator. Make sure you have all the necessary tools and components for this.

    Although it’s not that much complicated, you need to make sure you can do it before you even attempt. So, follow these steps.

    Step 1: Remove the alternator from your vehicle. You can follow the replacement part of the previous section where we have discussed how to do it. Now, you need to peel off the plastic cover and investigate if the bearing there is alright.

    Make sure it is snug. Otherwise, if it’s completely loose or has jams all around, you need to replace it.

    Step 2: At this point, you have to take off the resistors and enter the rectifier. Don’t forget to detach the soldered wires before unscrewing the mounting screws. It’s crucial to clean up the armature shaft prior to the brush replacement.

    Investigate if the springs are placed in the required places when you are remounting them.

    Step 3: Finally, you need to replace the voltage regulator. Once you do it, it’s great! This is the way you repair an alternator! Now, place all the things back into the place that you have removed.

    Safety Tips When Change An Alternator

    Although it sounds fun to replace an alternator, it may be quite risky, as well. So, make sure you are following some safety measures like the ones mentioned below.

    • Park the car on an even and level surface. This way, the vehicle won’t move or wiggle so you can do your work properly.
    • Disconnect the battery before you start. This is the powerhouse. So if you let it connected, it may electrify the area.
    • Jack the vehicle up if necessary. This will make it easy to access hard-to-reach spaces.
    • Remove the main power cable from the alternator for proper safety.
    • Release the safety clip connecting the wiring harness.
    • Always wear safety gears for personal physical safety
    • Put the bolts and tiny particles in a separate area
    • Be careful not to cut any wire with the screwdriver

    How Much Does It Cost To Change An Alternator?

    Again, it depends on the model and type of your vehicle. However, generally, it may cost you around $300 to $400 to buy an alternator. If you take it to a professional mechanic to change, he may take another 100 bucks as a service charge, making it around $500.

    Final Words

    So, typically, that was all you needed to know about how to change an alternator. Remember, you need to have a clear and sound knowledge of vehicles and vehicle engines before you even try it out.

    So, if you are not confident enough to change it yourself, it’s always better to hire a professional mechanic for the job.

    It may cost a bit more, but it will be safe.

  • How an alternator works? Know Why Do you Need This Piece

    How an alternator works? Know Why Do you Need This Piece

    As the sun gives power to everything on this planet earth and brings them to life, an alternator is something like that to your car. The majority of car users think all the power their car gets is from the battery. However, this is a big misconception as the alternator of the car generates most of the electricity. All your battery does is just start your car and give power support when the engine is not on. The way this system works is a bit complex, but don’t worry we will explain everything about an alternator in this article, starting from its definition to how an alternator works? its classification, and so on.

    What is an alternator?

    How-an-alternator-works

    An alternator is an essential part of your car that plays the main role in generating electricity. This generator’s principal responsibility is to distribute electricity in your car and keep the battery charged. All the vehicles out there that have a standard internal combustion engine carry an alternator.

    The size of an alternator is somewhere near a coconut. Usually, they are placed in the front part of your car’s engine, and you will see a belt spinning around it.

    Different Type of An Alternator

    Different Type of An Alternator​

    To understand how an alternator works? first of all you need to know type of an alternator. A vehicle’s alternator is classified based on its uses and designs. In this part, we will try to give you a clear idea about the five types of alternators in a vehicle.

    • Automotive Alternators
    • Diesel Electric Locomotive Alternators
    • Marine Alternators
    • Brushless Alternators
    • Radio Alternators

    Automotive Alternators

    Automotive Alternators​

    Automotive alternators are generally found in modern automobiles. It charges the battery and keeps the electrical system working when its engine is running. Before 1960 most of the automobiles used DC dynamo generators that had commutators.

    At that time, silicon diode rectifiers were quite affordable. So, besides those automotivealternators were also widely used.

    Diesel Electric Locomotive Alternators

    Diesel Electric Locomotive Alternators​

    The traction motor receives around 1,200 volts DC from the silicon diode rectifiers. And here, the traction alternator usually works as the incorporator. There are still many diesel locomotives are in service.

    The generator also helps to supply head-end power or HEP. And this option needs the constant speed of the engine.

    Marine Alternators

    Marine Alternators​

    This type of alternator is quite similar to automotive alternators. They are quite good at adapting to the salt-water environment. What makes them special is, they are explosion-proof.

    Brushless Alternators

    Brushless Alternators​

    The brushless alternator usually has fewer moving parts which means much lesser wear on the alternator. Alternators work by pulling air through from the rear side to the front in order to cool the internal parts.

    The air carries a lot of dust inside. But when it comes to a brush alternator, you won’t have to worry about the dust. So, it gives you more reliability than the others.

    Radio Alternators

    Radio Alternators​

    High-frequency alternators are generally used in radio transmission. They are famous for being used in morse code and some experiments of music and voice. These alternators were applied in producing radiofrequency current for transmitting radio signals, but the efficiency wasn’t that good.

    Components of An Alternator

    First and foremost, to understand how does an alternator works?  You need to get acquainted with their different components.  Understanding those parts and how they operate will make things easier. So, here are they:

    Pulley

    pully

    The pulley is the first part of an alternator, and the main responsibility of it is to keep the rotor assembly running while the engine is on. It’s a bridge between the car’s engine and rotor assembly.

    You will find three different types of alternator pulley, such as one-way clutch pulleys, overrunning alternator decoupler pulley, and solid pulleys. Bu these types does not mean they have a different function.

    Housing

    Housing​ Alternator

    The housing comes second; its main objective is to protect the inside part of the alternator. The housing can be different in two parts. The first one is front housing and the second rear. You will find the front housing near the pulley and the rear one at the opposite.

    Bearing

    Bearing

    After the housing, you will get the bearings. It assists in rotor assembly rotation without any intervention. They work as the main-supporter of the rotator to make sure they are running seamlessly. The front bearing is connected to the front housing and the rear bearing in the rear housing.

    Rotor Assembly

    Now, it’s time for the rotor assembly. The rotor assembly helps to generate a magnetic field. The stator coil will get disengaged when the rotor assembly is on the run.  And as the stator coil gets cut, it generates electricity.

    Stator Assembly

    Here we have the stator assembly whose main objective is to generate electric current when the rotor is being electromagnetic. Stator coil has two types of coil connection. One is the Y-type coil connection, and the other is Delta-type.

    Rectifier

    The rectifier works as a converter. It converts the alternating current to direct current when the charging process is going on. You know, the stator windings help to generate the alternating current. So, it’s not useable to the majority of car electrical systems.

    Voltage Regulator

    You might easily recognize its function by the name. Yes, it regulates the voltage. It controls how much power needs to be distributed to the battery from the alternator to keep the charging process running fine.

    The faster the rotator rotates, the more the electricity generates in the stator coil. And that’s where the voltage regulator comes into play. When the alternator’s output voltage gets below 14.5 V, the voltage regulator will automatically increase the current. And the voltage also starts to rise.

    On the other hand, when the alternator’s output voltage rises above 14.5 V, the voltage regulator will act this time by decreasing the supply of current and resulting in the voltage going down. In nowadays modern cars, the IC regulator type is found inside the alternator.

    Protective Cap

    In the end, we have found the protective cap. It works as a defense against the rectifier components. You will find it outside of the rear housing. Some manufacturers choose not to use a protective cap but just place all the parts inside the alternator.

    After reading all the details, do you think your alternator needs a replacement? No worries, here you can know How to Change Your Car Alternator.

    How Does an Alternator Work?

    The electricity procedure gets started with the engine of your vehicle. In modern vehicles, alternators are run by the crankshaft of the engine. And in a typical car, you will find two windings. One is a stator, and the other the rotor.

    The voltage passed through the regulator to the rotor winding, and that energizes the rotor and turns it into a magnet. The rotor gets rotated by the engine.

    In the engine, the rotating rotor produces a magnetic field, and this persuades the AC in the stationary stator winding.

    You need a diode to convert AC to DC in your car’s electrical system. The voltage regulator takes care of the output voltage. If you have been thinking about getting an alternator for your car, here’s have some of the Best Alternator Brands for Your Car.

    Hopefully, from the above discussion, you understand How Does an Alternator Works. If you want to know better, focus on the paragraphs below.

    Final Words

    As you can see, the way a car’s alternator works is quite difficult to understand. We have tried our level best to simplify it for you. So, how an alternator works?

    Well, to summarize, the alternator is a power source for your car’s electric system and recharges its battery. And in order to do that, the alternator needs to convert mechanical energy into electricity.

    I hope this article has helped you to find all the information you needed. Thanks for your reading.

  • How to maximize your Car battery life

    How to maximize your Car battery life

    How to maximize your Car battery life

    The one downside I find about the electric scooter is its short battery life resulting in a short traveling range. However, you can cope with this issue just by following some easy guidelines. Let’s get to know them:

    Don’t Charge Your Battery for Long Periods Unattended

    Let Your Scooter Battery Cool Before Charging

    Charge Your Electric Scooter Battery Before Storing It Long Term

    Always Use the Correct Charger for Your Scooter Battery

    Store Your Scooter in a Climate-Controlled Environment

    Don’t Charge Your Battery for Long Periods Unattended

    Don't-Charge-Your-Battery-For-Long-Periods-Unattended​

    As soon as the battery is fully charged, you should disconnect it from the power source. See the required charging time on the user guide, and don’t cross that limit. If you notice the battery is taking too long than the specified time, then your matter might have become faulty. So, you need a replacement.

    Let Your Scooter Battery Cool Before Charging

    Let-Your-Scooter-Battery-Cool-Before-Charging​

    After a short ride, you may charge the battery immediately; there’s no issue with that. But after having a long ride, you should leave the battery idle for at least 30 minutes to cool down. After that, you can plug it into the charger.

    Charge Your Electric Scooter Battery Before Storing It Long Term

    Your L-ion will survive more if you keep it on a constant stored charge. So, if you ever decide to keep your scooter inactive for a long time. Then we would recommend you keep at least 40% of the charge before leaving it. And charge the battery once a month.

    Always Use the Correct Charger for Your Scooter Battery

    Always-Use-The-Correct-Charger-For-Your-Scooter-Battery​

    You may find it convenient to buy an aftermarket charging cable. But in the long run, this may cost you more by reducing the battery life span. An aftermarket charger can charge your battery but runs at the risk of over or undercharging your battery resulting in irreversible damage.

    So. we would highly suggest you use the recommended charger and avoid any aftermarket charger.

    Store Your Scooter in a Climate-Controlled Environment

    Store-Your-Scooter-In-A-Climate-Controlled-Environment​

    How to maximize your Car battery life

    How-To-Maximize-Your-Car-Battery-Life​

    Your Li-ion can’t do well in an extremely cold or hot environment. Unusual temperature creates extreme pressure on your battery and stops them from functioning accordingly.

    When you keep the battery in such an environment for a long time, it may significantly reduce its life span. Our advice is to keep your battery dry and away from such an unfriendly temperature.

    What to look for buying a Jeep Wrangler battery

    What-To-Look-For-Buying-A-Jeep-Wrangler-Battery​

    It comes to the performance and safety of your Jeep Wrangler, selecting the perfect battery is very tough. The battery is your vehicle’s powerhouse, delivering the required electrical energy for starting the engine, powering the accessories, and assuring a smooth driving experience. The most important thing is that everyone can buy a jeep wrangler battery. These important features will allow to make an informed selection and select the best battery for your needs.

    Battery Type

    The first aspect to consider is the battery type. Jeep Wranglers typically use either lead-acid or AGM (Absorbent Glass Mat) batteries. Lead-acid batteries are the traditional option, while AGM batteries offer advanced features such as enhanced durability, improved resistance to vibrations, and maintenance-free operation. Evaluate your specific requirements and budget to determine which battery type suits your needs best.

    If you interested to buy a jeep wrangler battery, you can help this article for choose the Top 12 Best Jeep Wrangler Battery

    Battery Size and Compatibility

    Battery-Size-And-Compatibility​

    You can make sure the battery you purchase is the correct size and compatible with your Jeep Wrangler. Consult your vehicle’s manual or seek professional advice to determine the correct battery group size and specifications. Choosing the wrong size can lead to installation difficulties and potentially damage your vehicle’s electrical system. Double-checking compatibility will save you from unnecessary hassle in the long run.

    Cold Cranking Amps (CCA)

    Cold-Cranking-Amps-(CCA)​

    Jeep Wranglers are known for their off-road capabilities, and a battery’s cold cranking amps (CCA) rating is particularly important for such adventures. CCA measures the battery’s ability to start the engine in cold temperatures. Ensure that the battery you select provides sufficient CCA for your climate and driving conditions. Opting for a higher CCA rating will ensure reliable starts, especially in colder regions.

    Reserve Capacity (RC)

    Reserve capacity refers to the battery’s ability to sustain essential electrical functions in the event of alternator failure. It is measured in minutes and indicates how long the battery can power your Jeep’s electrical components without being recharged. Consider your usage patterns and the demands of your accessories to determine an appropriate reserve capacity for your needs.

    Brand Reputation and Warranty

    Brand-Reputation-And-Warranty​

    When investing in a battery for your Jeep Wrangler, it’s essential to choose a reputable brand known for quality and reliability. Research customer reviews, seek recommendations, and consider brands with a proven track record in the automotive industry. Additionally, pay attention to the warranty offered by the manufacturer. A longer warranty period indicates the brand’s confidence in its product’s durability.

    Maintenance Requirements

    Maintenance-Requirements​

    While AGM batteries offer maintenance-free operation, lead-acid batteries require periodic maintenance. If you prefer a hassle-free option, AGM batteries are a suitable choice. However, if you’re comfortable with maintenance tasks such as checking fluid levels and ensuring proper ventilation, lead-acid batteries can be a cost-effective alternative.

    Here we review the Top 12 Best Jeep Wrangler Battery Reviews, If you can be interested to buy your jeep wrangler battery you can check this post.

    Conclusion

    Conclusion​

    By considering factors such as battery type, size and compatibility, cold cranking amps, reserve capacity, brand reputation, warranty, and maintenance requirements, you can make an informed choice. Prioritize quality, reliability, and suitability to ensure your Jeep Wrangler remains powered up and ready for any adventure that comes it’s way. Happy driving!

    Remember, when purchasing a battery, it’s always recommended to consult with a professional or seek advice from experienced automotive specialists to ensure the best fit for your specific Jeep Wrangler model.

  • How to Replace your jeep wrangler battery?

    How to Replace your jeep wrangler battery?

    A jeep wrangler’s main power source is its battery. All electrical components of a car receive power to run from a battery. Over time, all car batteries show inefficient performance and replacing becomes mandatory. This statement is valid for the jeep wrangler battery also. So, when you see poor functionality from the battery of the jeep wrangler, don’t forget to replace it with a new one. So, you might be wondering, can I replace my jeep wrangler battery of my own? Yes, you can do it if you know how to replace your jeep wrangler battery.

    This article discusses the step-by-step process of replacing the battery of your jeep wrangler.

    Read the whole article intently.

    How Long Do Jeep Wrangler Batteries Last?

    After replacing your Jeep Wrangler Batteries, its lifespan depends on how long it can hold its charge and how slow it can recharge. The lifespan of a jeep wrangler battery depends on the below factors.

    • Driving habits
    • Weather
    • Maintenance
    • Power

    Depending on the above factors, a jeep wrangler’s battery lasts up to 3 – 5 years.

    Step-by-Step Process of  How to Replace Your Jeep Wrangler Battery

    Failure and success of any DIY project depend on the preparation a lot. Within an utmost short time, battery replacement of a jeep wrangler can be done. The condition is, all necessary components need to be available when accomplishing the task. Also, you will require the correct battery with matching terminals and the manufacturer’s manual.

    Hand gloves are another essential piece of equipment that will let you keep your surroundings neat and clean.

    Let’s look at the step-by-step procedure below.

    What You Will Need?

    • 10mm regular wrench.
    • Hand gloves.
    • Ratchet.
    • Socket

    Step 01: Opening of the Jeep Hood

    First, you will need to open the jeep hood. The battery of the jeep wrangler is located on the engine compartment’s passenger side. Use the 10mm wrench to remove the negative battery cable first.

    Step 02: Remove and Locate the Positive and Negative Cable

    Disconnect the negative cable from the battery and keep it aside. Then the positive cable also needs to be removed and keep it aside too. A crossbar runs over the top of the battery, locate it.

    Step 03: Removal of the Nuts and Washers

    Using a ratchet and socket, remove the 2 washers and nuts from the battery’s top crossbar hold-down. Counterclockwise turning to the bolts will let you lose it comfortably. These need to be removed from the J-bolts. At the same time, the crossbar requires removal from the battery.

    Step 04: Installation of a New Battery

    Hold the battery upright and remove it from the jeep, then store it in a safe place. Take a new battery and install it following the positive and negative terminals’ right orientation as they were in the old battery.

    The battery hold-down crossbar needs to be positioned over the battery. Then position the J-bolts into the crossbar holes and slide them on top of the battery.

    Step 05: Installation of the Nuts and Washers

    The 2 nuts and washers require to be installed on the J-bolts; use a ratchet and a socket to tighten them. Continue tightening until the crossbar is snagged. However, make sure not to over-tighten. The battery’s plastic case may damage if you do so.

    Step 06: Restoring the Connection

    Ensure restoring the connection between the positive cable and the battery’s positive terminal. Again use the wrench to tighten the bolt properly.

    Then, ensure restoring the connection between the negative cable and the battery’s negative terminal. Again use the wrench to tighten the bolt properly.

    Finally, close the jeep hood. In order to test the installation, start the engine.

    Jeep Wrangler Battery Size

    Since many different batteries are available in the market for jeep wrangler, buying the best jeep wrangler battery is a tricky task. So, what is the trick? Read below.

    Even batteries of the same brand for jeep wrangler have countless sizes. From 2007 – 2011 jeep wrangler models, the size of the OEM (Original Equipment Manufacturer) battery was group-34. For jeep wranglers from 2011 to now, the size changed to group 91. When the change comes for any reason, you will be notified by the manufacturer.

    Remember, the battery size may fit, but the cable may require some modification. So, it would be best to choose a battery for your jeep wrangler with the right size fitment. Similarly, correct terminal placement is also necessary.

    Jeep Wrangler Battery Price

    Generally, a jeep wrangler car battery lasts 3 – 5 years with great care and maintenance. Unfortunately, we don’t pay attention to check the car battery’s health, and when it starts malfunctioning, we show interest in it.

    To ensure a well-performed jeep wrangler battery, regular inspection of the battery, proper charging is mandatory. Using different types of battery chargers, you can charge the battery of jeep wrangler. At the same time, you can check your battery health by reading the manufacturer manual.

    Once a car battery malfunctions, replacing or changing it becomes necessary. A jeep wrangler battery price ranges from $45 – $ 300, and it depends on the battery quality, size, and power. This price is without the installation cost of a service center. On average, a service center will cost you $75 to install the battery in your jeep wrangler.

    You can save a few bucks reading the step-by-step instruction on a battery of jeep wrangler’s replacement process.

    Wrap Up

    The performance of a jeep wrangler relies on the battery, making it an integral part. So, proper care and maintenance are a must to get efficient results for many years.

    Replacing a jeep wrangler battery is not a difficult task. Following the above-discussed instructions about how to replace your jeep wrangler battery, you can comfortably complete the whole task within 20 minutes. All you need to do is, make sure you have selected the right jeep wrangler battery size to avoid inconvenience.

    [tcb-script async=”” src=”//z-na.amazon-adsystem.com/widgets/onejs?MarketPlace=US&adInstanceId=8bf98a44-841c-4cae-85b7-1f74770900c6″][/tcb-script]

  • How Often Should You Replace Your Car Battery

    How Often Should You Replace Your Car Battery

    Can a human body live without blood? Unfortunately, in this 21st century, no alternative is found of human blood even after medical advancement is much advanced. Similarly, the car battery is considered the car’s lifeblood, and no effective alternative has been invented so far. A car battery is assisting your car engine in starting and providing power to all other electrical components of your car. So, proper maintenance is mandatory for your car battery. For this, you have to know how often should you replace your car battery.

    This write-up shares the facts about car batteries and lets you determine the car battery replacement time.

    Let’s read intently.

    How Long Do Car Batteries Last?

    How Long Do Car Batteries Last?​

    After replacing your car battery, the lifespan of it depends on 2 questions. How long can it hold its charge, and how much time it requires to get recharged?

    If the battery can’t be recharged, be sure it is dead.

    However, you will get a minimum of 6 years of service from your new car battery if you drive your car in an ideal conditions like no harsh temperature or severe humidity.

    How to Know if Car Batteries Need to be Replaced?

    How to Know if Car Batteries Need to be Replaced?​

    When a car battery starts dying, it will show a few warning signs. Pay attention to the reaction of your vehicle when it starts. This way, you can keep yourself hassle-free in the middle of the road with an inactive car.

    Find the below 7 signs which will let you know that your car battery needs replacement.

    • Old Battery
    • Blotted or Misshaped Battery Case
    • Illuminated Check Engine Light
    • Slow Engine Crank
    • Common Electrical Problems
    • Corroded Battery Terminals
    • Severe Weather

    No.1

    Old Battery

    As stated earlier, depending on the driving condition and weather, a new car battery’s lifespan is 3 – 5 years. However, this statement is invalid for electric vehicle batteries.

    Do you remember when you last replaced your car battery? Check the manufacturing date available in the case of your car battery. Inspect the battery if it passes 4 years from its manufacturing date.

    No.2

    Blotted or Misshaped Battery Case

    The lifespan of a battery extremely gets affected by the wild climate. Your car battery will take an unfamiliar shape due to extreme weather.

    Swell and crack may happen when your car battery gets exposed to excessive cold or heat too frequently. The acid may come out if leaking happens, and it is a dangerous thing. It would be best if you discarded your battery that is not rectangular.

    No.3

    Illuminated Check Engine Light

    Illuminated Check Engine Light​

    From your car check engine light, you can know if your vehicle engine is dying. When you see illuminated check engine light, don’t make it late. Firstly, read your vehicle manufacturer manual, and then call a mechanic to inspect if the engine works at its full capacity.

    If they find that the battery is showing inefficient performance, replace it without hesitation.

    No.4

    Slow Engine Crank

    Slow Engine Crank​

    The internal components of a car battery get inefficient and wear out over time. Generally, a vehicle engine should be running promptly. When it doesn’t happen, and you have to wait for a few more seconds for the engine to start, be sure something is wrong with your car battery. A slow start is usually the last breath of a battery before it kicks.

    No.5

    Common Electrical Problems

    Common Electrical Problems​

    The car battery controls the functionality of different electrical components such as radios, lights of the dashboard, power windows, and wipers in the windshield. Failure in these electrical components’ functionality tells that the battery of your car is on its last breath.

    Unfortunately, these electrical problems can become worse compared to an inactive battery. If you face a severe electrical problem, buying or leasing a new car will be mandatory without repairing the problem.

    Remember, the more components such as a smartphone charger if you plug into your vehicle, the battery will die faster.

    No.6

    Corroded Battery Terminals

    Corroded Battery Terminals​

    If you ask a car owner what the reason for replacing your car battery is? Most of them will answer due to corrosion. When the battery acid leaks out at the connectors, it gets hardened. As a result, connecting points and terminal contact gets hampered. Simultaneously, recharge of the battery using an alternator can’t happen.

    You can conveniently locate corrosion in the battery. If you find hardened blue-green powder in the terminal, be sure it happens due to corrosion.

    In a few cases, cleaning this powder will increase the lifespan of your battery. Now one question might have popped up in your mind. What to use to clean the corrosion? Use a dry, soft cloth and a toothbrush for corrosion cleaning.

    However, buying the best car battery is the best solution at this point.

    No.7

    Severe Weather

    Severe Weather​

    Car batteries are prone to premature failure when exposed to severe weather.

    You will get 35% weaker performance from your car battery at 32° F. But the battery will act like it is performing at 100% efficiency. This way, the battery will become weaker and continuously fail to work at its best. Finally, it flops totally.

    When the battery gets frozen completely, “electrical death” happens to your car battery. The truth is, this problem is unrepairable. At this point, you have no other choice except to buy a new battery for your vehicle.

    Battery Selection Tips

    • Battery Size
    • Manufacturing Date
    • How Much is The New Car Battery?
    • Battery Ampere and Volt
    • Brand

    The main responsibility of a car battery is to supply power to the car components. So, while selecting the battery for your car, looking at the below key factors is necessary.

    Battery Size

    Battery Size​

    You will find a wide range of vehicle batteries in the market in terms of height, width, and length. You can’t pick any car battery for your car. Considering the battery size is the priority when selecting a vehicle battery.

    All batteries will not fit in your vehicle’s battery tray. In order to determine the battery size of your vehicle, read the manufacturer’s manual or get the old battery number.

    Manufacturing Date

    You will find a date code on every battery provided by the manufacturer. Some manufacturers use date/month format while others use letter codes for the month.

    It is significantly essential to understand the code. You must select the freshest battery always without fail. Avoid buying a vehicle battery that has already passed more than 6 months on the store’s shelf.

    How Much is The New Car Battery?

    Depending on your vehicle’s manufacturing year, model, and battery manufacturer, a car battery’s price varies.

    $80 – $150 is the range of cost of an average battery for a newer car model. Luxury vehicles require premium batteries, and they will cost you a minimum of $200. One notable thing is; installation cost is excluded in this case. A popular mechanic shop will cost you $70 for installation.

    You may love: What causes a car battery to die quickly?

    Sum Up

    An old car battery requires regular charging using the best battery charger to get optimum performance. Hopefully, from the above discussion, you got the answer to how often should you replace your car battery.

    Remember, regular checking and maintenance will boost up the lifespan of your vehicle battery. In some cases, you may need to take assistance from an expert. If so, don’t hesitate to call a vehicle doctor.